
An Interest In:
Web News this Week
- March 31, 2024
- March 30, 2024
- March 29, 2024
- March 28, 2024
- March 27, 2024
- March 26, 2024
- March 25, 2024
Some of Our Sources
- Mashable
- Technology Review
- Team Treehouse
- Abduzeedo
- Fuel Your Creativity
- Web Designer Depot
- Stylized Web
- CSS Tricks
- Freelance Switch
- Android Dissected
Help Webnuz
Referal links:
How to Get Started Making AndroidApps
Android is the most popular mobile operating system in the world today, running on billions of active devices, which include phones, tablets, smart TVs, and various home appliances. So it should come as no surprise that knowing how to create native apps for it can open up a world of opportunities. You could, for instance, create a new income stream for yourself by publishing paid apps or apps with in-app purchases on Google Play. Or you could have an extremely lucrative career developing Android apps for your clients.
But to develop Android apps, you're going to need the right tools installed on your computer. In this tutorial, I'll show you how to install them, configure them, and use them to build and run a very simple Android app.
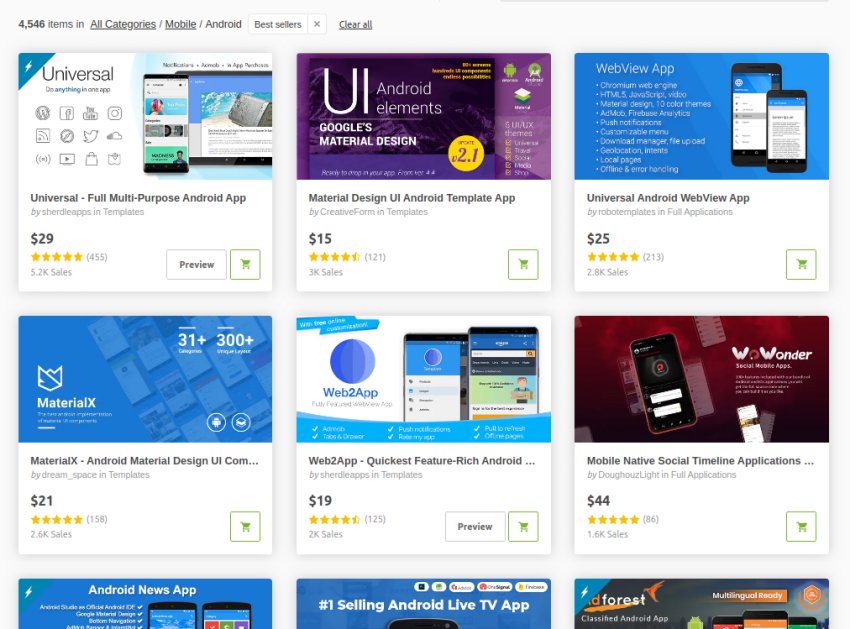
Premium Android App Templates From CodeCanyon
Note that you can use these same techniques to start an app using one of the premium app templates available from CodeCanyon—an online marketplace that has hundreds of Android app templates, which are very feature-rich and tailored to every domain. You can save days or even months of effort by using one of them.
Prerequisites
To be able to follow this step-by-step tutorial, all you need is a decent Internet connection and a computer that's running Windows 7 or higher. For an optimal experience, your computer should have at least 4 GB of RAM and about 5 GB of free disk space.
1. Installing Android Studio
Android Studio is the official integrated development environment for native Android app development. With powerful features such as intelligent code completion, static code analysis, a visual layout editor, and cloud integration, it offers a very pleasant and intuitive development experience.
Android Studio is free and open source. So go ahead and open the Android Developers website, and click on the Download Android Studio button to download its latest stable version.

Once the download's complete, you'll have an executable file with a name that looks like this: android-studio-ide-191.6010548-windows.exe. The numbers in the filename may, however, be different, depending on the version of Android Studio you downloaded.
Double-click on the file to start the installation wizard. In the dialog that pops up, press the Next button to proceed.

In the next screen, you'll be asked to select the components you want to install. Here's where you need to decide if you'll be needing an Android emulator, which is also often referred to as an Android virtual device, or AVD for short. Even if you have a real Android device, it's usually a good idea to have an AVD as well.

You'll then be prompted to specify where you want to install Android Studio. To go ahead with the default location, you can simply press Next.
Finally, you'll be asked if you want to add a shortcut for Android Studio in your Start menu. I suggest you don't change the defaults and directly press the Install button to start the installation.
Once the installation's complete, make sure that the Start Android Studio option is checked and press the Finish button.

2. Installing SDK Components
Android Studio, fundamentally, is a code editor. It can't build and run Android applications by itself. It depends on the Android SDK, which is short for the Android software development kit, to be able to do that. Therefore, as soon as Android Studio starts for the first time, it will ask you to install the SDK.
The first time Android Studio starts, you should see a welcome dialog that looks like this:

Press the Next button to proceed. In the next screen, you'll be prompted to select the type of setup you want for the SDK. For now, choose the Standard option, which gets you all the important SDK components, and press Next.
You can then choose whether you want a dark or light UI theme for your IDE. Select Darcula if you prefer the dark theme.

Finally, you'll be able to see the actual SDK components that are going to be installed. Press the Finish button to download and install them.

After all the components are installed, Android Studio is ready to be used. So you'll be taken to the following welcome screen:

3. Creating a Virtual Device
If you have a real Android device handy and want to use it instead of a virtual device, you're free to skip this step.
Even though you now have all the tools required to run an Android virtual device, you still need to create one. So open the Configure menu you see near the bottom of the welcome dialog and select the AVD Manager option. In the dialog that pops up, click on the Create Virtual Device... button.
You'll now be prompted to select a hardware profile for your virtual device. This profile, among other specifications, decides the screen size, resolution, and pixel density of your AVD.

To make it easy for you, Android Studio has profiles that emulate various popular phones, such as Pixel, Pixel 2, and Pixel 3 XL. As you may have guessed, the profiles that sport the Google Play icon are ones that can run Google Play. For now, I suggest you choose the Pixel 2 profile and press Next.
On the next screen, you must specify the version of Android that must be installed on the AVD. You can choose any version you prefer, but you must have that version's system image available on your computer. So, usually, you'll have to first click on the Download button shown beside the version, and then select the version.

On the final screen of the wizard, give a name to your AVD, and press the Finish button.

4. Creating a New Project
To make sure that Android Studio and all the SDK components are installed and configured correctly, let's now try to create and run a new Android Studio project.
Start by clicking on the Start a new Android Studio project button on the welcome screen.
Android Studio offers several templates you can use to avoid starting your project from scratch. For now, choose the Empty Activity template and press Next.

You can think of an activity as a screen of your app. Most apps have several activities, and thus several screens. By choosing the Empty Activity template, you're creating an app with one screen that has nothing but a "Hello World" label inside it.
On the next screen, give a name to your project and press the Finish button.

Android Studio may take a few minutes to prepare the project and download additional dependencies, such as Gradle, which serves as the default build toolkit.
Once the project's ready, press Shift-F10 to build and run it. Alternatively, you can open the Run menu and select Run 'app'.
If you followed all the steps in this tutorial, the project should build successfully. Furthermore, Android Studio should be able to automatically launch the AVD you created and run the project on it.

Conclusion
In this tutorial, you learned how to install Android Studio and all the SDK components it needs. You also learned how to create, build, and run an Android Studio project.
Premium Android App Templates From CodeCanyon
The default templates offered by Android Studio are very basic and provide minimal, generic functionality. CodeCanyon is an online marketplace that has hundreds of additional templates, which are way more feature-rich and domain-specific too. You can save days or even months of effort by using one of them.
If you have trouble deciding which template on CodeCanyon is right for you, these articles should help:
 App Templates20 Best Android App Templates of 2019
 Android SDK10 Best Android Game Templates
 App Templates15 Best eCommerce Android App Templates
 Material DesignBest Material Design Android App Templates
Original Link: https://code.tutsplus.com/tutorials/how-to-get-started-making-android-apps--cms-34427
TutsPlus - Code
 Tuts+ is a site aimed at web developers and designers offering tutorials and articles on technologies, skills and techniques to improve how you design and build websites.
More About this Source Visit TutsPlus - Code