
An Interest In:
Web News this Week
- March 31, 2024
- March 30, 2024
- March 29, 2024
- March 28, 2024
- March 27, 2024
- March 26, 2024
- March 25, 2024
Some of Our Sources
- Web Designer Wall
- TutsPlus - Design
- Fuel Your Creativity
- Inspiredology
- FanExtra - PSD
- My Ink Blog
- Android Dissected
- Codrops
- The Verge
- TechPowerUp
Help Webnuz
Referal links:
Creating a Pinterest style image gallery in Vue
In this article I will show a quick and easy way to create a Pinterest style layout grid to showcase images. This grid will be responsive meaning that it will automatically resize as the browser window increases or decreases in size.This will display images regardless of their individual height and does not level out all images to have them start on the same row. Instead when the image in a column ends then the next image starts leaving you with a picture board layout where all images are not aligned equally. So lets get started.
What we will be creating
This is the flowing Pinterest style layout we will be creating.
Getting images from Unsplash
Pinterest is a platform that allows users to display images on a specified topic like a wedding or vacation or any other idea. In order to make this application work, I need a way to get a range of images that corresponds to a specific topic. A great website for images is Unsplash.
Unsplashs website has a search field where you can enter a topic to search for and it will return all images that correspond to that topic. We are going to duplicate this setup by allowing our users to click buttons that correspond to the search for a single topic. When the user clicks on the button it will show images from Unsplash using our Pinterest style grid.
Creating a Developer Account
To use the Unsplash API you need to create a developer account. Head over to Unsplash.
Click on the Register as a Developer button. Fill in the required fields to create your account. Once you have created your account you will have to verify your email. Just click on the email that they send you to verify your account.

Login to your account. You will need to create a new application. Click on the New Application button.
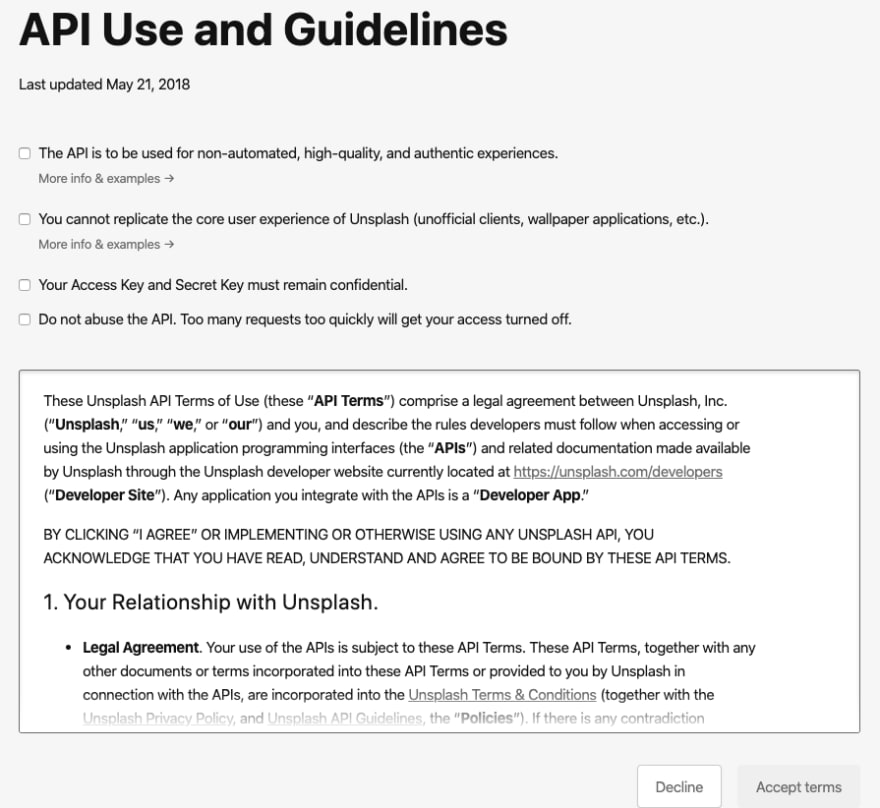
You will be presented with four items that you must click to acknowledge each of them. Once all are checked then click the Accept Terms button.When you application you will be assigned a unique access key.

We will use this access key when calling the Unsplash API to retrieve images.
Creating our application
Now we are ready to create our Pinterest clone in Vue.js. We will be using the Vue CLI to create our application. If you do not have the Vue CLI installed, you can install it globally with this command:
npm install -g @vue/cliWe can now use the Vue cli to create our application. I am going to call my application vue-pinterest. To create the application enter this command in your terminal:
vue create vue-pinterestThe CLI will ask you if you want to use the default settings or manually select features.

For this demo I am using the default settings so you can just hit enter.
Once this command has finished running, it will give you instructions on how to access the newly created application.

So lets follow these instructions and change into the vue-printerest directory with this command:
cd vue-pinterestTo start our server you run the command:
npm run serveWe can test that our server is running by opening our browser and going to this url:
localhost:8080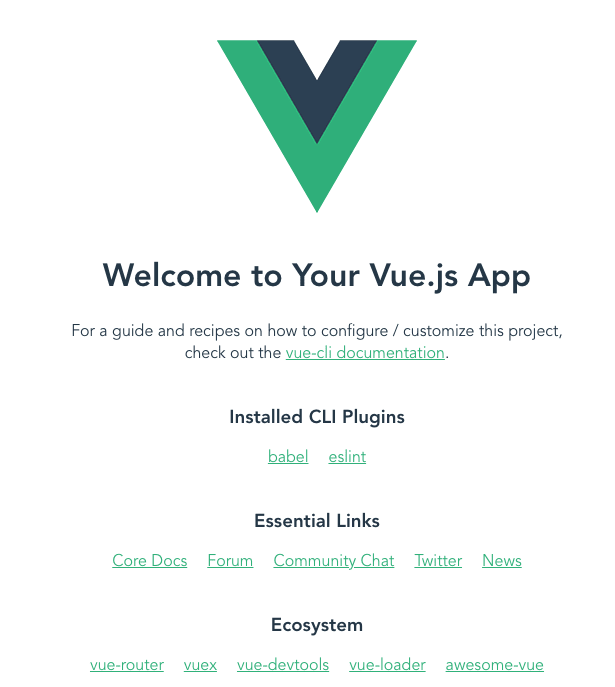
Adding Packages to our Application
If you still have your server running you will need to stop it. We are going to be using two packages to provide the functionality for our Pinterest style grid application. The first package we are going to use is axios. Axios will provide the http client that we use to call the Unsplash API to retrieve pictures. The second package is vue-stack-grid. This package is a Vue component that will create a Pinterest style layout for us. To install them run this command:
npm install axios vue-stack-gridBuilding our Application
Since we created our application using the Vue CLI it created an initial layout for us. We are just going to delete all of this and start with our design. Open up the App.vue file in the src directory. In the template section delete everything except for the initial div. Your template should look like this:
<template> <div id="app"> </div></template>We are going to start by creating a container that will be used to display all our images. Inside that container we are going to have a wrapper where we will put all our buttons. Each button will display images related to a single topic like images displaying autumn or the ocean. We will start with one button and later on we will add additional buttons. To do that add the following to your App.vue file:
<template> <div id="app"> <div class="container"> <div class="button-wrapper"> <button class="btn" @click="searchUnsplash('Autumn')">Autumn</button> </div> </div> </div></template>Now that we have that added, lets add some styling for our container, button-wrapper and btn classes. These styles will be added in the style section at the bottom.
For the container lets set it to have a width of 80% of the screen width and center it on the screen. This will provide a familiar look-and-feel for our website visitors where content is centered on the screen with an equal amount of white space on both sides of the content.
For the button-wrapper class I want to use flexbox to center the buttons on the screen. I also want to provide a margin below the buttons so there is some white space between the buttons and where the images start being displayed.
The last style I want to put in is for the btn class. I want to give the button a green background with white text. I want the button to have padding and a specified font-size.
Here are the styles you need to add for these three classes:
.container { width: 80vw; margin: 0 auto;}.button-wrapper { display: flex; justify-content: center; margin-bottom: 25px;}.btn { font-size: 18px; background-color: #42b983; color: white; padding: 10px 20px;}Displaying images from Unsplash
Next we need to call the Unsplash API to get images. In the button I added an @click function called searchUnsplash. Lets write this function next. This function will use the axios module we installed earlier. To use that module we need to import it. On the first line of the script section add this line to import axios:
import axios from "axios";Next lets create our searchUnsplash function. Add a methods section to our script and create the function. The function will take in one argument which is the topic that we want to search for on Unsplash. In this function we want to call the Unsplash API and get back a list of pictures. To make this call using axios we will need to provide our app access key we were assigned when we created our application on Unsplash. We will store the images we are returned in a variable called images. Here is the code for the searchUnsplash function just be sure to insert your access key where noted:
searchUnsplash(topic) { this.images = []; axios .get( `https://api.unsplash.com/search/photos?query=${topic}&per_page=20`, { headers: { Authorization: "Client-ID <YourAccessKeyGoesHere>", "Accept-Version": "v1" } } ) .then(response => { this.images = response.data.results; }) .catch(() => { this.images = []; }); }The url that we are calling is the url for Unsplashs API. I am passing the query as the topic that we want to search for. The only other option I am adding is setting the per_page to show 20 images instead of the default 10. I want to display more images so that we have a bigger image gallery.
We are storing the results from the API call in a variable called images. So lets create that now. Add a data section in our script and add images. We set the default value to an empty array. Here is what your data section should look like:
data: () => ({ images: [] }),Adding our Pinterest grid
The last thing we need to do is to display the images we get back from our searchUnsplash function. To do that we need to import in both Stack and StackItem from the vue-stack-grid package we installed earlier. So below the line that imports axios add the following import:
import { Stack, StackItem } from "vue-stack-grid";After we import it we need to add these two components into our application. Add a components section with these two items. Your components section should look like this:
components: { Stack, StackItem },Next we need to add these two components in our template section. The first component stack will be used to set the width of each column in our grid as well as the padding between each image. The second component stack-item will be the wrapper for each image displayed in our grid.
The stack component has some props available to use. The props we are going to use are:
- column-min-width this is the width of each column of images
- gutter-width this is the distance between each column in our grid
- gutter-height this is the distance above and below each image in a column
- monitor-images-loaded this prop tells the component that we are displaying images
We will add a style to the stack-item tag to provide some animation when images are initially displayed and when the screen is resized.
Here is what our template looks like now:
<template> <div id="app"> <div class="container"> <div class="button-wrapper"> <button class="btn" @click="searchUnsplash('Autumn')">Autumn</button> </div> <stack :column-min-width="300" :gutter-width="15" :gutter-height="15" monitor-images-loaded > <stack-item v-for="(image, i) in images" :key="i" style="transition: transform 300ms" > <img :src="image.urls.small" :alt="image.alt_description" /> </stack-item> </stack> </div> </div></template>Testing our Application
Start your server by entering this command in the terminal:
npm run serveGo to your browser and open up this url:
localhost:8080You should see this display:
Adding more search buttons
To improve on our application, lets add two more buttons that users can click to search for images. We will add buttons to search for cliff and ocean. If you want to search on different terms you can. You can copy the line that has our button and paste it in two times so we have three buttons. For each button make sure you update the term that is passed to the searchUnsplash function to be the term you want to search for. Also change the text of the button to reflect that term.
Now we have three buttons that search for different terms. The only problem is that all three buttons are touching each other. I would like to add some white space between the buttons. We can do that by adding this code to the style section:
.btn:not(:last-child) { margin-right: 10px;}While we are adding styles lets add one last style for our images that are being displayed. Pinterest adds rounded corners to images so we want to do the same. We also want the image to be the full width of the column it is in. The height of the image will be adjusted accordingly to the width of the image. This will allow the image to resize if the screen is resized. So add this last style:
img { width: 100%; height: auto; border-radius: 12px;}Get the code
You can get a copy of my code for this article from my GitHub repo here. Please star the repo!
You can view a live demo of the app here.
Conclusion
We have quickly and easily created a Pinterest clone for displaying images in a grid. Thank you for reading. Please check out my other articles. You can also click here to follow me on Twitter.
Original Link: https://dev.to/ratracegrad/creating-a-pinterest-style-image-gallery-in-vue-6dc
Dev To
More About this Source Visit Dev To