
An Interest In:
Web News this Week
- March 23, 2024
- March 22, 2024
- March 21, 2024
- March 20, 2024
- March 19, 2024
- March 18, 2024
- March 17, 2024
Some of Our Sources
- Engadget
- Just Creative
- Smashing Magazine
- Vandelay Design
- You The Designer
- FanExtra - PSD
- My Ink Blog
- Web Resource Source
- Daily Now
- Hashedout
Help Webnuz
Referal links:
Behind the Scenes of My New Website
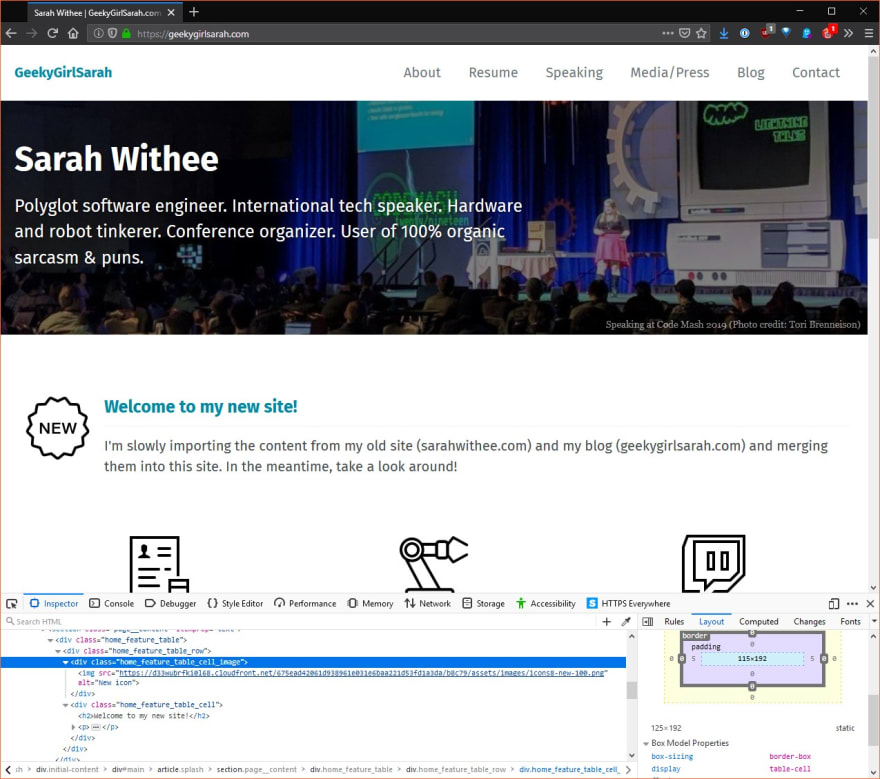 Screenshot of my new website along with the web developer tools open
I did it! It took about two years to finally get myself to sit down and do it, but I converted two Wordpress sites on three domains into one static site!
I did a few cool things with it, so I wanted to talk about what I did.
(Note: I talk about a lot of technologies on here. Its all my own opinion and no ones paid me to say any of this.)
Before
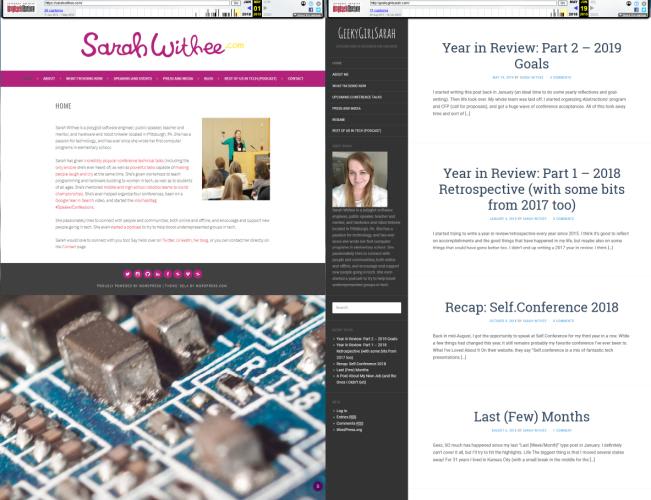 Screenshots of my old sites side-by-side
I had originally owned the domain sarahwithee.com and used that mostly to host a website I built in mid-college. It was fine for what I needed it for. I was kind of terrible at design and had this left over cursive thing my friend Andrew made for me years ago, so I decided to find a theme and incorporate that. My friend Josepha Haden had a theme on her site at the time (in Wordpress) that I really liked, and used it on my site after modifying a few colors and background images. I didnt have a lot going on at the time, so it made for a nice personal site.
I acquired geekygirlsarah.com later after realizing it was kind of my brand and I really should own it. I decided to start up a blog (again) after a blog a couple of friends and I had, Binary Girls, really didnt pick up traction. (It was mostly me publishing stuff.) I imported in my old content and started slowly writing new content on there.
The Reasons For Updating
At one point, a site I helped manage running in Wordpress got hacked, and the whole site was trashed. It took a looooong time to recover from that, so I ended up installing some security software on my two WP sites. It worked well, but Id see the stats and see how often they were getting hacking attempts and it was rather disconcerning. I didnt know if it was because I now had a bit more of an audience or because my site was attractive for being WP (or both), but slowly started wondering if I needed something else.
I knew a lot of people were hyping the static sites. I was all on board for this idea, but one of the things that held me back was analytics. While Im not a huge stats-watcher (and likes/follows/etc. arent my thing), I wanted something but didnt want Google Analytics. I saw there were a few services, which I could pay for but didnt feel up to paying their rates at the time. This held me back some.
Mostly, the site just felt outdated. It was old, the stuff people would come to my site for wasnt really highlighted or easy to find. It was getting harder to manage the content (tables in WP are a pain and several pages had duplicate content). I wanted something easier to update.
The Upgrade
I knew my main options seemed to be Jekyll (based in Ruby), Hugo (based in Go), and Gatsby (based in React/Node), all of which I wasnt familiar with.. I tried all three out for a bit. I really liked Hugo. I started on a trek to find some Hugo themes, found a few I liked, but after so much playing around, I couldnt get them to quite do what I wanted. I was diving too far into docs to even pull off a few simple things, and I got tired of it and gave up.
There was Gatsby, but after reading a lot of the documentation, it felt the barrier to entry for me was too large. So I played around with Jekyll. And found some themes and could get them to work. After trying what felt like over a dozen, I finally settled on Minimal Mistakes, a nice flexible theme that I could get to do most of everything I wanted.
I knew Id need to convert everything over from Wordpress to Markdown sounded like an absolute pain. I found a WP plugin to help with this, but a lot didnt convert over well. I had to go back through each page (over two dozen, which I later condensed down to about 15) and all of the posts (over 55). But I got everything to work and my site was coming together.
I knew content rewriting was a thing that needed to happen. I spent some time trying to over over each page, keeping bits I liked, scrapping bits I didnt, and making it first person instead of third. (I figured this helped as it was my site, but also it might be a portfolio-like thing, so I wanted it to sound more like I did it, not someone else did it for me). I figured if I was putting a resume and my blog on here, third person also seemed out of place. I updated all of the bios and pages and was good to go.
Finally, I wanted it to be open source, so I threw it on GitHub. I also knew about Netlify from some friends, so I tried them out and found it was super easy to deploy sites (and automatically update them), so that switch was easy. (And bonus: I was going to use Matomo for analytics, but within a month Netlify announced their own stats for a quarter of the price. I jumped right on that!)
Some Cool Parts
I know a lot of people know me from my conference speaking, so its important to have up to date notes, slides, videos, etc. from my talks as people go there to see things. I went through and updated all of the pages with the latest information, version histories, code updates, links to the GitHub content, and so on.
Theres also a schedule of talks, something I managed in HTML directly. It was pretty annoying. I knew Jekyll could do some manipluation based on data files. I started loading talks into a YAML data file (the full file is here):
- date: 2019-05-11 end_date: 2019-05-12 event: "!!Con" location: New York City, NY type: Lightning Talk title: I Built an Artificial Pancreas! event_url: http://bangbangcon.com/ talk_url: https://sarahwithee.com/speaking/building-an-open-source-artificial-pancreas/- date: 2019-06-07 end_date: 2019-06-08 event: Self.Conference location: Detroit, MI type: Session title: Building an Open Source Artificial Pancreas event_url: http://selfconference.org/events/2/sessions#speaker_2 talk_url: /speaking/building-an-open-source-artificial-pancreas/I was going to make files for past and future talks, but then found out based on date, I could filter things. I wrote this blurb that I was kind of proud of for pretty-printing talks in two tables, one for upcoming and one for past talks (and see the full file here):
{ % assign today = "now" | date: "%Y-%m-%d" % }| Date | Event | Location | Talk Type | Talk Title | |------|-------|----------|-----------|------------|{ % for item in site.data.conftalks % } { % assign event_date = item.date | date: "%Y-%m-%d" % } { % if event_date >= today % } { % if item.date == item.end_date % } { { item.date | date_to_xmlschema | date_to_string: "ordinal", "US" } } { % else % } { { item.date | date_to_xmlschema | date_to_string: "ordinal", "US" } } - { { item.end_date | date_to_xmlschema | date_to_string: "ordinal", "US" } } { % endif % } | { % if item.event_url % } <a href="{ { item.event_url} }" target="_blank">{ { item.event } }</a> { % else % } { { item.event } } { % endif % } | { { item.location } } | { { item.type } } | { % if item.talk_url % } <a href="{ { item.talk_url} }">{ { item.title } }</a> { % else % } { { item.title } } { % endif % }{ % endif % }{ % endfor % }(Note: to make this render for the blog as well as aid in readability, I added a variety of spacing to it. Check out the full file for the correctly formatted version.)
This would print the items in a table if the date was today or later. I basically made another similar block for if the date was in the past. Once I put everything on one line (since tables are formatted that way in Markdown), it was so cool to think I just could add a conference to a data file and the site generates itself. (I shouldnt be too amused at this, I am a programmer. But simplifying this felt wonderful!)
 Screenshot of the Latest Podcasts section of the home page
For the home page, the theme included a feature_row, which let you have a left-aligned or right-aligned row on the front page. I modified it a bit to include a feature_block, which would let me show a few entries of data of some sort. I chose to put upcoming talks, latest podcasts, and blog posts there. I can pull from the same YAML lists of data, and just pull the last 3 (or however many) items I want and show it as a list.
That looks like this:
{ % assign type = include.data_type % }{ % assign show_number = include.show_number % }{ % if type % } { % assign today = "now" | date: "%Y-%m-%d" % }{ % assign count = 0 % }{ % if f.url contains "://" % }{ % capture f_url % }{ { f.url } }{ % endcapture % }{ % else % }{ % capture f_url % }{ { f.url | relative_url } }{ % endcapture % }{ % endif % } <ul> { % if type == "posts" % } { % for item in site.posts % } { % if count < show_number % } { % assign date = item.date | date: "%Y-%m-%d" % } <li>{ { date | date_to_string: "ordinal", "US" } }: <a href="{ { item.url } }" target="_blank">{ { item.title } }</a></li> { % assign count = count | plus:1 % } { % endif % } { % endfor % } { % elsif type == "talks" % } { % for item in site.data.conftalks % } { % if count < show_number % } { % assign date = item.date | date: "%Y-%m-%d" % } { % if date >= today % } <li>{ { date | date_to_xmlschema | date_to_string: "ordinal", "US" } }: <a href="{ { item.event_url } }" target="_blank">{ { item.title } }</a> ({ { item.type } }, { { item.event } })</li> { % assign count = count | plus:1 % } { % endif % } { % endif % } { % endfor % } { % elsif type == "podcasts" % } { % for item in site.data.podcasts reversed % } { % if count < show_number % } { % assign date = item.date | date: "%Y-%m-%d" % } <li>{ { date | date_to_xmlschema | date_to_string: "ordinal", "US" } }: <a href="{ { item.url } }" target="_blank">{ { item.episode } }</a> ({ { item.show } })</li> { % assign count = count | plus:1 % } { % endif % } { % endfor % } { % endif % } </ul>{ % endif % }(Note: Again, its been modified for readability and rendering. See the full file here.)
The simple explanation of this:
- If there is a type (posts, talks, podcasts) passed in, show the block (otherwise hide it)
- Loop through the items sorted forward (talks) or reversed (podcasts/posts)
- If the item matches a future/past date, then show it
- Increase a counter
- Break out of loop after you reach 3 (or however many) items
So then I just do three of these together to make all three blocks on the home page!
<div class="home_feature_table_cell"> <h2>Upcoming Talks</h2> { % include feature_block data_type="talks" show_number=3 % } <a href="https://dev.to/speaking/" class="btn btn--primary">All Talk Schedule</a></div>Deploying
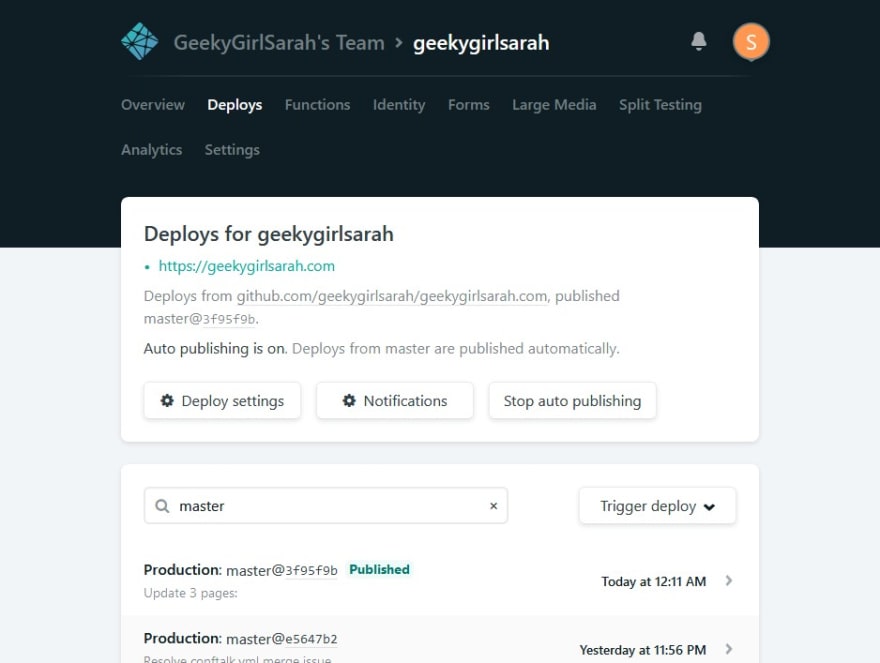 Screenshot of the Deploys page of Netlify
I knew if I was getting rid of Wordpress, I could keep hosting a server myself, or I could use something like Netlify to do it all for me. Netlify is a static site hosting service. When you push up content, they not only publish it but use a variety of content delivery networks (CDNs) to make it super fast. Personal plans are
free (you pay for extra services or larger sites). Its quite great!
Because it ties into Git and GitHub, I can just push to my master branch and it will automatically rebuild the Jekyll site and push out a new version. Its configured to run the right commands (mostly just jekyll build) and because it caches all the dependencies, it gets to be super fast. I just need to include a .ruby-versionfile in my root to tell it what version to build the site against and it works its magic.
They even include free features like getting certificates from Lets Encryptso I can have SSL for no cost either. I have all three of my old domains here (geekygirlsarah.com, sarahwithee.com, geekygirlsarah.dev). All of them redirect to geekygirlsarah.com for simplicity sake. (I may get rid of sarahwithee.com in the future for one of the other SarahWithees in the world to have.)
Another cool feature is they allow some simple web forms to submit somewhere. I configured a contact form on a page in a way that lets Netlify just take the content and email it to me. It can also be set up with spam detection, which has kept the emails slim. The free version allows 100 messages a month, but since I never even hit that with spam from my last site, I didnt worry much.
But finally, there was one pesky thing I wanted to ensure: backward compatibility. I still have business cards, old tweets that link things, links from my slides, etc. I wanted them to be rather smooth and seamless to just transition over. Netlify came to the rescue again with a _redirects file in my root. This tells them to just send anyone going to a URL in the left column to a URL in the right. This lets me also do things like link geekygirlsarah.com/talks back to its new home geekygirlsarah.com/speaking and still work. Blog posts all go to their original URLs, and it lets the confusion of two sites work like one.
# Redirect domain aliases to primary domainhttps://sarahwithee.com/* https://geekygirlsarah.com/:splat 301!https://geekygirlsarah.dev/* https://geekygirlsarah.com/:splat 301!# These extra rules are required because HTTPS is not forcedhttp://sarahwithee.com/* https://geekygirlsarah.com/:splat 301!http://geekygirlsarah.dev/* https://geekygirlsarah.com/:splat 301!# Optional: Redirect default Netlify subdomain to primary domainhttps://geekygirlsarah.netlify.com/* https://geekygirlsarah.com/:splat 301!http://geekygirlsarah.netlify.com/* https://geekygirlsarah.com/:splat 301!# Misc captures/talks/ /speaking//press/ /media/# Talk - Building Your Team to Last/build-your-team/ /speaking/building-your-team-to-last//building-your-team/ /speaking/building-your-team-to-last//buildingyourteam/ /speaking/building-your-team-to-last//buildyourteam/ /speaking/building-your-team-to-last/# Other talks are included on full file...I try to make short links to my talks, and I realized they might be easily confused, so I set up all the variations people might mess it up with. (Or I might forget I told people!)
Analytics
Wordpress contains some great analytics from their Jetpack plugin. I used that, but cant use it anymore with the static site. I knew I didnt want Google Analytics (as I try to avoid dumping my life into their data-hungry servers) so I looked into alternatives. I found Matomo, which would have been $20/month for their analytics. It was just a pixel tracker Id add to the page. While I was on the trial of that to see if I liked it, Netlify actually announced their own analyticsfor $5/month. Since theirs is based from pure server logs (which are collected anyway), it doesnt require pixel trackers. And since the logs exist anyway, it doesnt slow down the site. I signed up to try it out and liked it.
Feedback
I spent a couple of weeks working on the basics, then sent it to some friends for opinions. Most of them loved it immediately. Feedback continued to improve over the next month or so as I rewrote pages, reworked layout of things like the Speaking page, and reworked the navigation to try to simplify everything.
And now? Im quite happy with it! It takes only a couple of minutes to open up my repo, make a small change if need be, commit it, and Netlify automatically pulls in that change and publishes a site in under 20 seconds. I can write a blog post nearly anywhere I have a text editor, then just also push it to my _posts directory and it magically shows up on the site. And I can run a local copy easily with bundle then jekyll serve and see anything. It also makes me happy that I can offer it online in case anyone wants to use any of the same things I did.
Id also love to hear any feedback of what you think, especially if you remember my old websites. Drop me a tweet on Twitter, a message on my Contact page, or drop me a line some other way. Id be curious to hear what you think! Im also happy to answer questions about if you see anything you want to incorporate onto your site.
Thanks for reading!
~ Sarah
Original Link: https://dev.to/geekygirlsarah/behind-the-scenes-of-my-new-website-3044
Dev To
More About this Source Visit Dev To