Organize Your WordPress Media Library With Folders
Today’s WordPress websites need to be media-rich to draw in and retain traffic. If you have a WordPress website, chances are you will have uploaded a video or images to be displayed on your pages and posts.
Whether you want to show off customer testimonials, your latest blog posts, your best images, or just celebrate the members of your team, there is a...
Tame chaos and transform your content using one of the best WordPress gallery plugins available on CodeCanyon. Read on to find out about these WordPress...
The default media section of your WordPress dashboard is where this media is uploaded and accessed. Unfortunately, this media section has been underdeveloped by WordPress. The section lacks structure and a folder system that will allow you to easily organize your media. Even with a modest-sized media library, you will have a difficult time navigating through all of your files.
The WordPress Real Media Library plugin allows you to easily manage your media library by creating a folder system that includes collections and galleries.
Not only does it allow you to create these custom folders, but it will allow you to create galleries from the media in these folders to display on your website.
In this article, I am going to show you how to organize your media library and create a gallery using the WordPress media folder plugin.
What We Will Be Creating
We'll be creating two different elements with this plugin. The first one is going to be the folders inside your WordPress media library. These folders will allow you to drag and drop any media file into these folders and organize them however you like.
The second element we will create is a gallery to be displayed on your website from the folders that were created. This gallery will be able to display any images, videos, or any other media file that you want in a stylish and visually appealing way for your website viewers.
Creating Folders
Currently, there is no way to create folders in the media section of WordPress to categorize your images, videos, and PDFs. Fortunately, the Real Media Library plugin allows us to create these folders to organize our media.
To access the Real Media Library plugin, click Media > Library on your WordPress dashboard. On the left-hand side of your library, you will now notice a new editor section has appeared. This is where will we create our new folder system.
Based on the content you have on your website, think of what specific folders to create for your website and what makes the most sense for you.
To create a folder, click the folder icon at the top left-hand side of the editor. This will create a folder in the editor and will ask you to insert a name for the folder.
For our example, we are going to create two different folders. One called Home Page and one called Blog Post 1. From there, we are going to drag and drop the specific media that we want in each of these two folders. We are going to go ahead and place three different images in each of these two folders.
You also have the option to create subfolders. Simply click on the checkbox next to the folder you just created and click the folder iconagain at the top of the editor and a subfolder will be created.
You can create as many folders and subfolders as you would like and place any type and quantity of media in these folders as well.
To watch this folder creation process in action, view the video below.
Creating Galleries and Collections
Not only does the Real Media Library plugin allow you to add a folder system to your library, but it also allows you to add in media galleries to your posts directly from the WordPress page and post editor. You will be able to insert an entire media folder into your pages and posts as a customizable gallery.
To do this, you will need to create a collection and a gallery. A collection is a folder that allows you to add galleries and other collections inside of it. You will need to create a collection folder in order to add a gallery.
Currently, the only type of media that you can add to your website is images. To create a collection, click theimage icon at the top of the plugin editor. This will create your collection and from there you will name this collection.
In our example, we want to add a collection and gallery to our homepage, so we are going to label our collection Homepage.
Next, click the checkbox next to the main page. At the top of the editor, you will see a new icon has appeared that looks like a grid. This icon allows you to add a gallery.
Click on the grid icon and a gallery will appear as a subfolder under your collection. We are going to label the gallery Home Page Gallery 1.
Next drag and drop in the media that you would like to have in the specific gallery that you created. We are going to add four different photos.
Adding Galleries to Your Pages and Posts
Now that you have created a collection and gallery, you can now insert the gallery into any page or post.
First, head on over to a new page or post. You will notice on your visual editor on the page or post that a new icon that looks like a grid has been added. Click on the grid icon.
A popup menu will appear which allows you to choose what gallery you would like to add and how you would like it to appear on your page. In the Folder Section, we are going to select our recently created gallery Home Page Gallery 1. In the Link To section, we are going to choose Media File. This will allow the image to be displayed in a lightbox when it is clicked.
Next, we are going to change the columns to 1. Once you have finished adjusting the gallery settings, click the Okay button and a shortcode for the gallery you created will now appear in the visual editor.
Finally, click Preview on the right-hand side of the WordPress page editor. The gallery that you just created will now be displayed on your page or post with a lightbox popup for each image.
Watch how to add a gallery to your page or post in the video below.
Getting the Most Out of Real Media Library
While the functions of the WordPress Real Media Library are straight forward, there are limitless possibilities when it comes to organizing your library and creating galleries.
Here are a few ways that you could organize your media library with the folder system.
Organize by specific pages and posts. If an image or video is intended for only one specific post, this will make it easy to add in the right place.
Organize by products or topics. For example, you could group photos based on the specific products that you sell on your site.
Organize by date. WordPress allows you to view media that was added in a specific month but not by year or day. You could create folders for media taken on certain days, for example for photos of events.
With the gallery function, you can display your images from specific folders on any page or post. The most effective areas of your website to place these galleries are:
the homepage
product pages
the About Us page
blog posts
Conclusion
The default media section in your WordPress is chaotic. While there may be a search function to find the media files you are looking for, there is no way for you to organize all the various media that you have uploaded to your site. With the WordPress Real Media Library plugin, you will be able to create folders and galleries and import these galleries directly into your pages and posts.
Tuts+ is a site aimed at web developers and designers offering tutorials and articles on technologies, skills and techniques to improve how you design and build websites.


.jpg) WordPress10 Best WordPress Slider & Carousel Plugins of 2019
WordPress10 Best WordPress Slider & Carousel Plugins of 2019 WordPressBest Video Background Plugins for WordPress
 WordPress6 Best Weather WordPress Widgets & Plugins
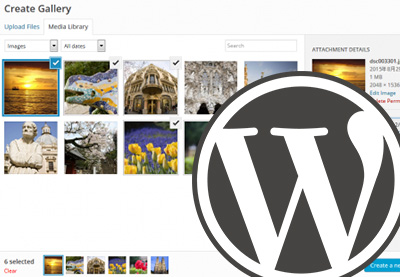 WordPress17 Best WordPress Gallery Plugins
 Tuts+ is a site aimed at web developers and designers offering tutorials and articles on technologies, skills and techniques to improve how you design and build websites.