
An Interest In:
Web News this Week
- March 28, 2024
- March 27, 2024
- March 26, 2024
- March 25, 2024
- March 24, 2024
- March 23, 2024
- March 22, 2024
Some of Our Sources
- BoingBoing
- Simplebits
- TutsPlus - Code
- Inspiredology
- Crazy Leaf Design
- Fudge Graphics
- Spyre Studios
- Web Resource Source
- Hashedout
- The Verge
Help Webnuz
Referal links:
Target CSS for Specific Content With WordPress Template Tags
Learning WordPress development isn't just about learning to code PHP.
You'll also need some HTML and CSS skills if the sites, themes and/or plugins you create are going to work well.
In this tutorial, I'll show you an incredibly useful feature of WordPress that mixes PHP with some simple CSS. It's an easy-to-use but powerful technique which will give you more control over the way your content is displayed.
The feature I'm talking about is the body_class(), the_ID(), and post_class() template tags. If you add these to your theme template files (or to your loop files) in the correct place, they will generate CSS classes that you can then use to style your content with laser-like precision.
In this tutorial, I'll show you how and where to add these to your theme, and how to then write CSS styling that targets the classes and IDs generated.
Adding the body_class() Tag to Your Theme
The first tag is body_class(). As you might guess, this applies to the body element.
In your theme's header.php file, find the line that opens your body element:
<body>
To add the template tag, edit it so it reads like this:
<body <?php body_class(); ?>>
Save the file and close it. Now open a site using your theme and take a look at the underlying code of your pages.
Here are a few examples of the code generated in my demo site.
First, the home page:
<body class="home page-template page-template-page-full-width page-template-page-full-width-php page page-id-7">
That tells us a few things about the page:
- It's the home page.
- It's using a page template.
- It's a full-width page.
- It's a page (as against a post or a custom post type).
- Its ID is 7.
That's quite a lot we now know about the page. Now let's take a look at a category archive:
<body class="archive category category-basics category-154">
This tells us that we're in an archive, that it's a category archive, and more specifically that it's the category archive for the 'basics' category with the ID of 154.
You might be wondering why all of those classes are needed: why have an archive class as well as a category class, for example? The reason is so that you can set your CSS styling to be as targeted as you need. So if you want to style all archive pages, you'd target the archive class. If you wanted to target all category archives, you'd target the category class, and if you wanted to target this category in particular, you'd use its slug or ID.
Finally, let's take a look at a single blog post:
<body class="post-template-default single single-post postid-3522 single-format-standard">
Now we're getting even more information:
- It's using the default post template.
- It's a single post of the post type post.
- Its ID is 3522.
- It's using the standard format template.
Once again, you could use any of those to target at whatever level you like: single posts of any post type (including pages and custom post types), single posts of the post post type, posts using a given format, or even this one specific post.
Later in this tutorial, I'll demonstrate how to add styling to target these classes. But first, let's look at how you can add another template tag that's used for styling.
Adding the post_class and the_ID Template Tags to Your Theme
As well as adding classes to the entire page, you can also add a class to each post within the page. In a single post or page, this would add just one set of classes, but in an archive page, you'd generate different classes for each post in the archive.
You add this code in the loop, when opening the article element for each post.
The code without the template tags is this:
<?php if ( have_posts() ) : while ( have_posts() ) : the_post(); ?>
    <article>
        <!-- contents of loop -->
    </article>
<?php
endwhile;
endif; ?>
But when you add the template tags, it looks like this:
<?php if ( have_posts() ) : while ( have_posts() ) : the_post(); ?>
    <article id="post-<?php the_ID(); ?>" <?php post_class(); ?>>
        <!-- contents of loop -->
    </article>
<?php
endwhile;
endif; ?>
There are two template tags here:
- The
the_ID()tag adds the post ID as a CSS ID, meaning it will be unique. - The
post_class()tag adds a list of classes depending on the properties of the post, in a similar way tobody_class().
Let's take a look at the code they generate.
First, in the homepage:
<article id="post-7" class="post-7 page type-page status-publish has-post-thumbnail hentry">
This gives us:
- An ID of
post-7, using the post ID. - A similar class of
post-7. - A class of
page, telling us this is a page (not a post). type-pagetells us this is the 'page' post type.status-publishtells us this page has been published.has-post-thumbnailtells us this page has a thumbnail (or featured image)—you can use this to style posts with and without them differently so the featured images fit into the layout.hentryis a class that's designed to help styling in RSS feeds.
That's a lot of classes you could potentially target!
Now let's take a look at a post in the archive page from earlier:
<article id="post-3522" class="post-3522 post type-post status-publish format-standard has-post-thumbnail hentry category-basics category-featured category-roundups tag-admin tag-content-management tag-hosting tag-installing-wordpress tag-performance tag-plugins tag-security tag-seo tag-site-management tag-themes tag-wordpress-com">
Whoah! There's a lot to take in there.
I'm not going to go through the full list in detail, but to summarize, you've got classes relating to the post ID, the post type, its status, category, post thumbnail, the categories it's in, and the tags it's been given.
Finally, a single post:
<article id="post-3522" class="post-3522 post type-post status-publish format-standard has-post-thumbnail hentry category-basics category-featured category-roundups tag-admin tag-content-management tag-hosting tag-installing-wordpress tag-performance tag-plugins tag-security tag-seo tag-site-management tag-themes tag-wordpress-com">
This is very similar to the post in the archive page, which means that if you want to target single posts, you don't use these classes, but instead you use the single class generated by body_class.
Using the Generated Styles in Your Stylesheet
Once you know what the generated styles and classes are, you can start to use them to style your content.
A common example is to style posts from different categories differently.
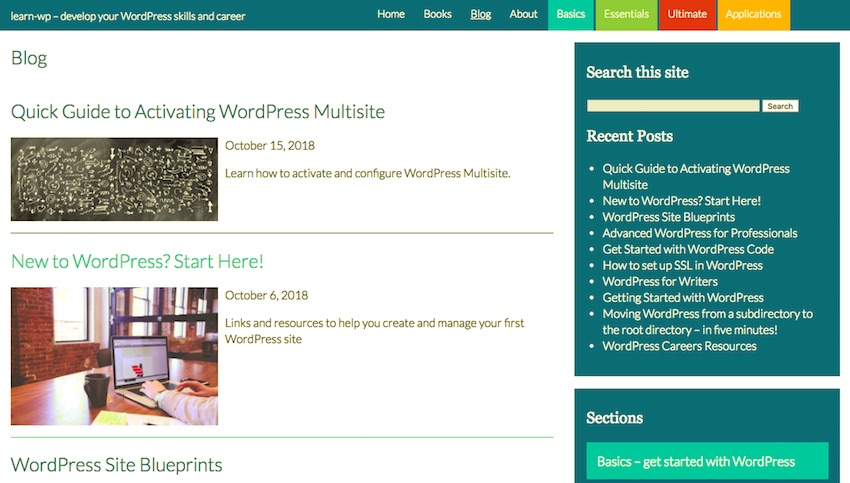
Here's the blog page in my demo site:

You may have spotted from the navigation menu at the top that I've used different colors for each of the main categories. In each category archive page, I achieve this by targeting the relevant category archive using the classes generated by the body_class() template tag.
Here's the CSS for the basics category:
.category-basics #content h1.page-title,
.category-basics #content h2.entry-title a:link,
.category-basics #content h2.entry-title a:visited {
    color: #48C9C8;
}
.category-basics #content article {
border-bottom: 1px solid #48C9C8;
}
This makes the headings and borders a shade of cyan in the category archive page:

I've also added styling to the category description, giving that a cyan background and white text:
.archive-meta {
    background: #21759B;
color: #fff;
padding: 0.2em 0.5em;
font-weight: 400;
font-size: 1.1em;
overflow: auto;
}
.category-basics .archive-meta {
background: #48C9C8;
}
The reason I've used styling for the .archive-meta class for the text and layout is that I want all the category archives to have the same styling for that. It's only for .category-basics .archive-meta that I'm adding the background color.
Note that in both cases, I'm targeting the classes output by the body_class() tag, as I want to style all posts in the category archive.
But what if I wanted to style posts in the main blog by category? I'd do this by targeting the classes generated by the post_class() tag.
So to add cyan styling to posts in the main blog page from the basics category, I'd add this styling:
.blog #content .category-basics h2.entry-title a:link,
.blog #content .category-basics h2.entry-title a:visited {
    color: #48C9C8;
}
.blog #content article.category-basics {
border-bottom: 1px solid #48C9C8;
}
This targets two classes generated by our template tags:
- the
blogclass added to the body element by thebody_class()tag - the
category-basicsclass added to the article element by thepost_class()tag
After adding that, the blog page looks like this:

I could then go further and add color styling by category to every post in the blog. In this case, I won't do that as many of the posts are in multiple categories. But if your site has posts in clearly delineated categories, targeting the category classes like this can help give each category in your site a different style.
WordPress Template Tags Combined With CSS Can Be Very Powerful
Now you know how to add the body_class(), post_class(), and the_ID() template tags to your theme, to generate classes and IDs in your output pages, archives, and posts.
You can use this in many ways to target styling on specific post types, categories, formats, or even on individual posts.
Try thinking of ways you can use this to add an extra dimension to the design of your site.
Original Link:
TutsPlus - Code
 Tuts+ is a site aimed at web developers and designers offering tutorials and articles on technologies, skills and techniques to improve how you design and build websites.
More About this Source Visit TutsPlus - Code