
An Interest In:
Web News this Week
- March 26, 2024
- March 25, 2024
- March 24, 2024
- March 23, 2024
- March 22, 2024
- March 21, 2024
- March 20, 2024
Some of Our Sources
- Techcrunch
- Team Treehouse
- Just Creative
- Abduzeedo
- FanExtra - PSD
- Reencoded
- Specky Boy
- Android Dissected
- Dev To
- TechPowerUp
Help Webnuz
Referal links:
Introducing NumPy
Numeric is a package that was originally developed by Jim Hugunin. It is considered the ancestor of NumPy, a Python library and an open-source project created by Travis Oliphant which stands for Numerical Python. Travis created NumPy by incorporating features of the Numarray package into Numeric.
The fundamental idea of NumPy is support for multidimensional arrays. So NumPy can be considered as the base for numerical computing in Python, and has been created to enable Python to be used in solving mathematical and scientific problems. The NumPy module provides us with hundreds of useful mathematical functions in addition to constants such as the base of natural logarithms (e) and pi (π).
This tutorial shows how we can use NumPy to work with multidimensional arrays, and describes the ndarray object, a fundamental object of the library.
Installing NumPy
Since Python doesn't come bundled with NumPy, the first step to use this library is to go ahead and install it. This can be simply done by running the following command in your command prompt:
pip install numpy
To make sure that NumPy was installed successfully, run the following commands in Python's IDLE:

If the import statement at least runs successfully, then you are all set!
The ndarry Object
The ndarray is a fundamental object of NumPy. This object is an N-dimensional array, meaning that it contains a collection of elements of the same type indexed using N (dimensions of the array) integers.
The main attributes of ndarray are data type (dtype), shape, size, itemsize, data, and ndim. Let's learn what each attribute means through an example.
In this example we are going to use NumPy to create an array. I will not give the dimensions of the array and other information, as we will see that using the above attributes.
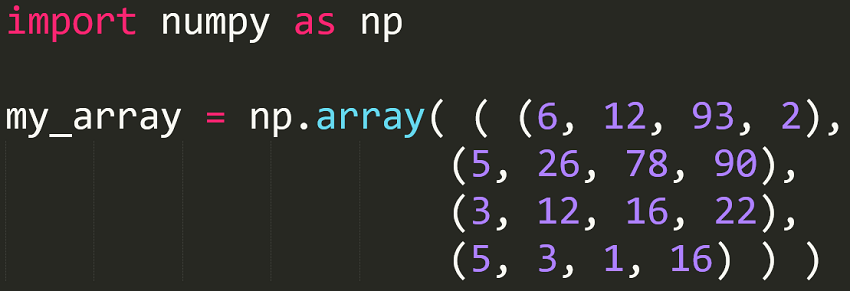
Notice that we used the array function to create an array. The output of the above script is as follows:

Let's now return to our attributes.
dtype
The dtype attribute can be run as shown in the following statement:
data_type = my_array.dtype
The above statement will return int32 as the data type. This means that the elements of the array are of type int32. I'm getting 32 as I'm using a 32-bit Python. If you are using a 64-bit Python, you will get int64, but we are dealing with integers at the end.
Since NumPy is used in scientific computing, it has many data types, as shown in the documentation. Notice that the majority of the NumPy data types end with a number, which indicates the number of bits associated with that type (this was mentioned briefly in the above paragraph).
The following examples show how we can convert from one type to another:
bool(35)
bool(0)
bool(-1)
float(True)
int(67.7)
float(87)
The above statements return the following:
True
False
True
1.0
67
87.0
Although we can convert from one type to another, it is important to note that we cannot convert a complex number into an integer or a float.
shape
The shape attribute returns a tuple of the array dimensions. So the following statement:
array_shape = my_array.shape
will return (4,4), meaning that our array is composed of 4 rows and 4 columns.
size
The size attribute returns the number of elements in the array. Thus, if we type:
array_size = my_array.size
we will get 16 as the result, meaning that we have 16 elements in our array.
itemsize
The itemsize attribute returns the size of one array element in bytes. The following statement:
array_item_size = my_array.itemsize
will return 4. This means that each array element is of size 4-bytes.
data
The data attribute is a Python buffer object that points to the start of the array's data. If we type the following:
array_location = my_array.data
we will get the following: <memory at 0x0000021E7E8D7EA0>.
ndim
The attribute ndim will return the number of the array dimensions. So typing the following statement:
array_dimension = my_array.ndim
will return 2, that is the array consists of two dimensions.
After understanding what the different ndarray attributes mean, let's take a look at some more examples of using ndarray.
Example 1
Say we want to create a new array with one row and five columns. We would do that as follows:
my_array = np.array( (1, 2, 3, 4, 5) )
The output of the above statement is: [1 2 3 4 5].
Example 2
In this example, I'm going to rewrite the first example in this tutorial, but using [ ] instead of ( ), as follows:

Example 3
This example shows how we use a structured data type, where we declare the field name and the corresponding data type:
import numpy as np

height_type = np.dtype([('height', np.float)])
If we print(data_type), we will get the following:
[('height', '<f8')]We can apply the height_type to an ndarray object, as follows:
import numpy as np

height_type = np.dtype([('height', np.float)])
my_array = np.array([(1.78,),(1.69,),(1.88,)], dtype = height_type)

# access content of height column
print(my_array['height'])
Selecting Items
In this section I'm going to show you how to select specific items in the array. For our array shown above under the "ndarry Object" section, let's say we want to select the item located on the third row and the fourth column. We will do that as follows:
my_array[2,3]
Remember that indexing here starts at 0, and that's why we wrote [2,3] instead of [3,4].
More on NumPy Arrays
In this section, we are going to delve deeper into NumPy arrays.
Empty (Uninitialized) Arrays
We can create an empty array using numpy.empty with the following syntax:
numpy.empty(shape, dtype, order)
The meanings of the parameters in the above constructor are as follows
Shape: the shape (dimensions) of the empty array.
dtype: the desired output type, which is optional.
Order: if you want a C-style (row-major) array, you would typeC; if you want a FORTRAN-style (column-major) array, you would typeF.
So let's create an empty [2,2] array of type int. We can do that as follows:
import numpy as np

empty_array = np.empty([2,2], dtype = int)
print(empty_array)
The above script will return the following random values as the array wasn't initialized:
[[1852795252     111218]
 [   7500288   53018624]]
Array Filled With Zeros
In order to create an array where the elements are all zeros, we use numpy.zeros. The constructor here has the same syntax and parameters as in numpy.empty. So, if we want to create a [2,2] zeros array of type int, we can do that as follows:
import numpy as np

zeros_array = np.zeros([2,2], dtype = int)
print(zeros_array)
The above script will return the following:
[[0 0]
 [0 0]]
An array with all elements having the value 1 can be simply created in the same way as above, but with numpy.ones.
Arrays With Evenly Spaced Values Within a Given Range
We can use numpy.arange to create an array with evenly spaced values within a specified range. The constructor has the following format:
numpy.arange(start, stop, step, dtype)
Below is the meaning of each parameter:
Start: this is where the interval begins. The default value is0.
Stop: the end of the interval, provided that this number is not included.
Step: the spacing between values. The default value is1.
dtype: the data type of the output. If not specified, the data type will be the same as that of the input.
Let's take an example of numpy.arange.
import numpy as np

my_array = np.arange(1,10)
print(my_array)
The result of the above script is:
[1 2 3 4 5 6 7 8 9]
Reshaping an Array
In order to reshape an array, we use the numpy.reshape function. This function gives a new shape to an array without changing its data. As shown in the documentation, the function has the following attributes: numpy.reshape(a, newshape, order='C'), where a is the array we would like to reshape, newshape is the new desired shape provided that the new shape should be compatible with the origin shape, and order is an optional argument which refers to the index order we would like to use to both read the array a and how we would like to place the elements in the reshaped array.
C
means reading/writing the elements using C-like index order; F means reading/writing the elements using Fortran-like index order, and A means reading/writing the elements in Fortran-like index order if a is Fortran contiguous in memory, C-like order otherwise.
I know I've covered a lot in the above paragraph, but the concept is very simple. Let's take our original array my_array and try to reshape it. Remember that the new array (reshaped array) has to be compatible with the original array. For instance, my_array has the shape (4,4), that is we have 16 elements in the array, and the new array has to have that number of elements.
We can reshape my_array by setting it to have eight rows and two columns, as follows:
import numpy as np
my_array = np.array(((6, 12, 93, 2),
     (5, 26, 78, 90),
 (3, 12, 16, 22),
 (5, 3, 1, 16)))

my_array_reshaped = np.reshape(my_array, (8,2))
In which case we would have the following output, where we also have 16 elements.
[[ 6 12]
 [93  2]
 [ 5 26]
 [78 90]
 [ 3 12]
 [16 22]
 [ 5  3]
 [ 1 16]]
What if we write the reshape statement as follows?
my_array_reshaped = np.reshape(my_array, (8,3))
In this case, you would get the following error:
ValueError: cannot reshape array of size 16 into shape (8,3)
Concatenating Arrays
If we want to join two or more arrays of the same shape along a specific axis, we can use the numpy.concatenate function. The syntax of this function is: numnumpy.concatenate((a1, a2, ...), axis=0)y.concatenate. a1 and a2 are arrays having the same shape, and axis is the axis along which the arrays will be joined, provided that the default is 0.
Again, let's take an example to simplify the concept. In this example, we will be joining (concatenating) three arrays.
import numpy as np
array_1 = np.array(((1, 2),
                   (3, 4)))

array_2 = np.array(((5, 6),
               (7, 8)))

array_3 = np.array(((9, 10),
               (11, 12)))

contacted_array = np.concatenate((array_1, array_2, array_3))

print('First Array: ')
print(array_1)
print('Second Array: ')
print(array_2)
print('Third Array: ')
print(array_3)
print('Concatenated Array: ')
print(contacted_array)
The output of the above code is as follows:
First Array:
[[1 2]
 [3 4]]
Second Array:
[[5 6]
 [7 8]]
Third Array:
[[ 9 10]
 [11 12]]
Concatenated Array:
[[ 1  2]
 [ 3  4]
 [ 5  6]
 [ 7  8]
 [ 9 10]
 [11 12]]
Splitting Arrays
Contrary to joining arrays as shown in the above section, let's see how we can split (divide) an array into multiple sub-arrays. This can be done using the following function:
numpy.split(ary, indices_or_sections, axis=0)
ary is the array to be divided into sub-arrays. Regarding indices_or_sections, if it is an integer N, the array will be divided
into N equal arrays along the axis. If it is a 1-D array of sorted integers, the entries
indicate where along the axis the array is split. axis is the axis along which to split.
The following example will reverse what we have done in the previous example, that is to return the concatenated array into its three array constituents:
import numpy as np

concatenated_array = np.array(((1, 2),
           (3, 4),
       (5, 6),
       (7, 8),
       (9, 10),
       (11, 12)))

split_array = np.split(concatenated_array, 3)

print('Original Array:')
print(concatenated_array)
print('Split Sub-arrays:')
print('First Sub-array')
print(split_array[0])
print('Second Sub-array')
print(split_array[1])
print('Third Sub-array')
print(split_array[2])
The output of the above script is:
Original Array:
[[ 1  2]
 [ 3  4]
 [ 5  6]
 [ 7  8]
 [ 9 10]
 [11 12]]
Split Sub-arrays:
First Sub-array
[[1 2]
 [3 4]]
Second Sub-array
[[5 6]
 [7 8]]
Third Sub-array
[[ 9 10]
 [11 12]]
Conclusion
As we saw in this tutorial, NumPy makes it very flexible to work with arrays. The tutorial was just a scratch on the surface of this interesting Python library. NumPy still has many more features to look at to get the most out of this library. A comprehensive book on the topic by the NumPy creator himself is Guide to NumPy.
Furthermore, see what we have available for sale and for study in the marketplace, and don't hesitate to ask any questions and provide your valuable feedback using the feed below.
Original Link:
TutsPlus - Code
 Tuts+ is a site aimed at web developers and designers offering tutorials and articles on technologies, skills and techniques to improve how you design and build websites.
More About this Source Visit TutsPlus - Code