
An Interest In:
Web News this Week
- April 4, 2024
- April 3, 2024
- April 2, 2024
- April 1, 2024
- March 31, 2024
- March 30, 2024
- March 29, 2024
Some of Our Sources
- Simplebits
- Team Treehouse
- Six Revisions
- My Ink Blog
- 24 Ways
- Stylized Web
- Specky Boy
- Android Dissected
- Dev To
- TechPowerUp
Help Webnuz
Referal links:
How to build a ukulele from scratch
The folks at Dremel have been featuring different makers, and this month they asked me to be their Dremel Maker. I was happy to do it because I've been using a Dremel Moto-Tool since I was 12.
I participated in a Facebook Q&A, offered some tips on Twitter, and made a ukulele from scratch. To make it, referred to the free plans for the acoustic travel uke, available from Circuits and Strings. Here are my build notes. This could be a fun family project.
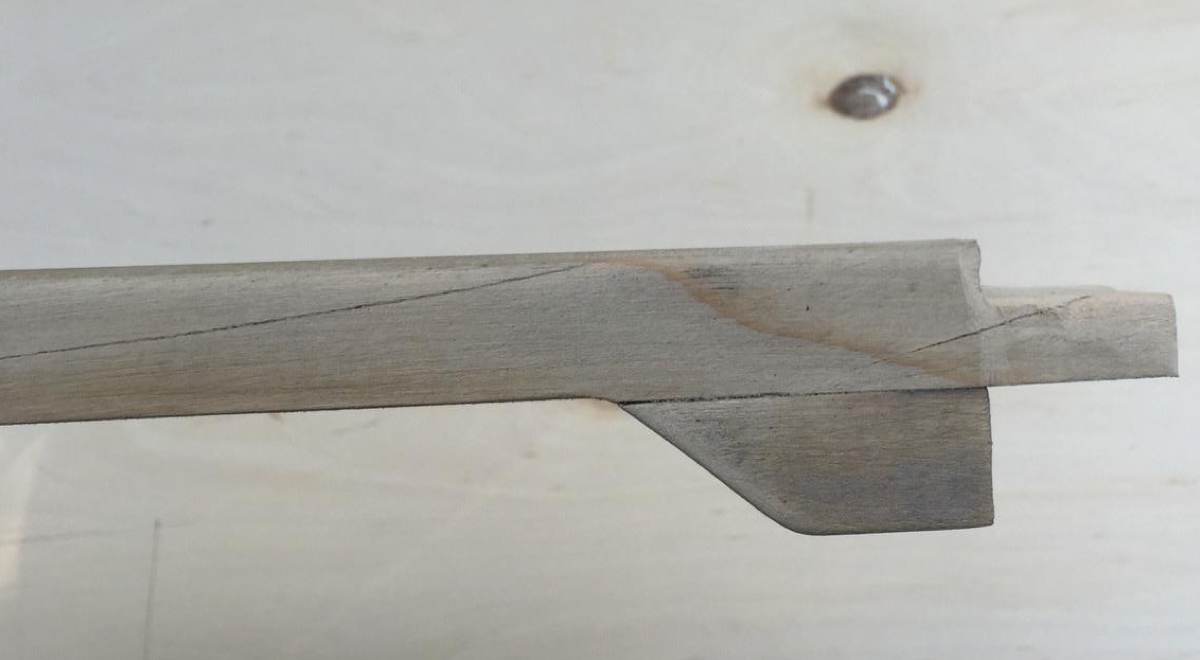
As much as possible, I like to use materials I already have at home. For the neck, I used a piece of wood that was destined for the recycling bin. I'm glad I didn't toss it out. I think it is pine, but I'm not sure. It's 1.5 inches wide, .075 inches high, and two feet long. I cut the end as shown, and glued another cut piece to same end, using wood glue. I clamped it and let it set while I went to work on the rest of the uke.
I bought a 6-pack of 6 x 12 x 0.125 inch plywood on Amazon for $11. I used it for the body of the guitar and the fretboard. How did I know how to space the frets? I just held another uke against the new fretboard and marked the spacing with a pencil. If you don't have a uke on hand, here's a fret spacing calculator. Using a square - like the one shown - against a piece of wood's factory edge is a good way to ensure parallel and perpendicular lines.
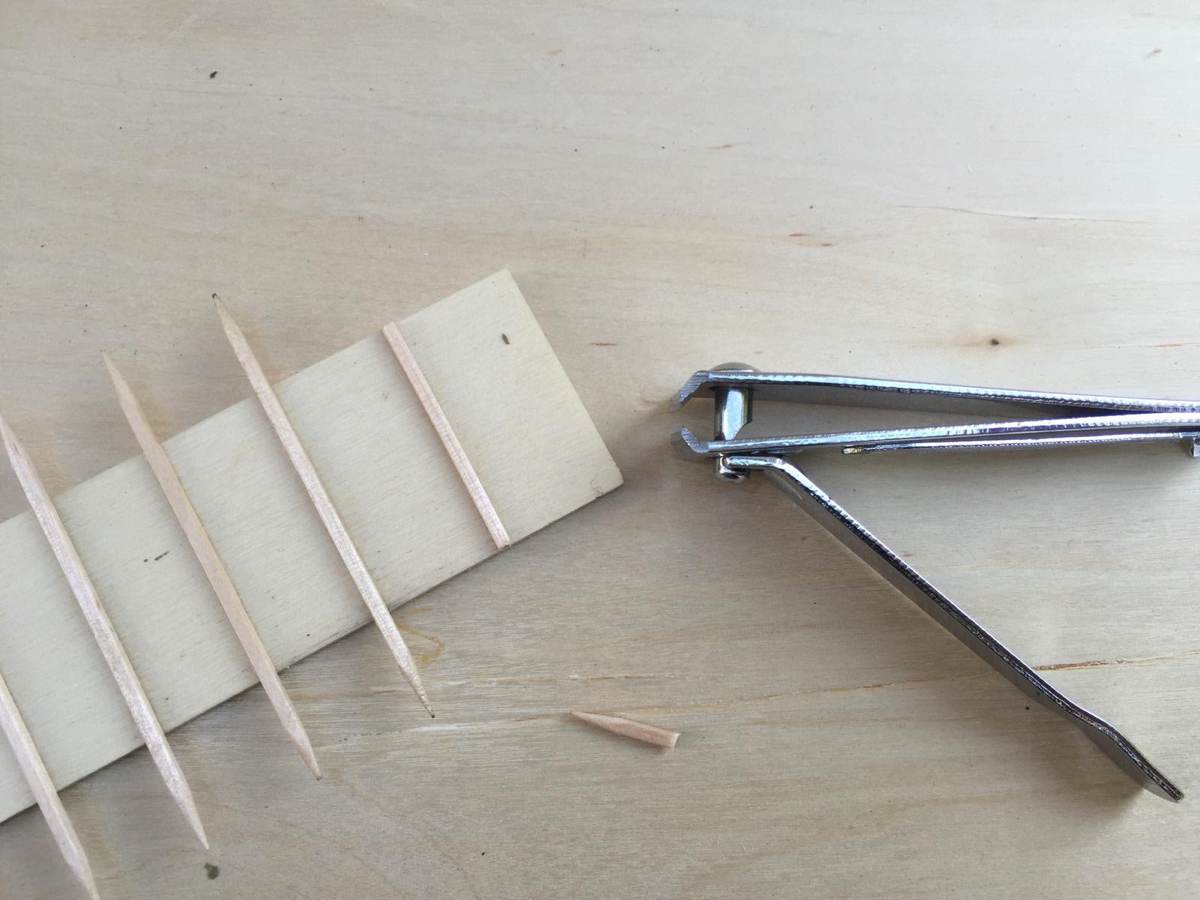 You can see that I used square toothpicks for frets. They work great, and are easier than fret wire. I removed the protruding ends with nail clippers and rounded them with my Moto-Tool.
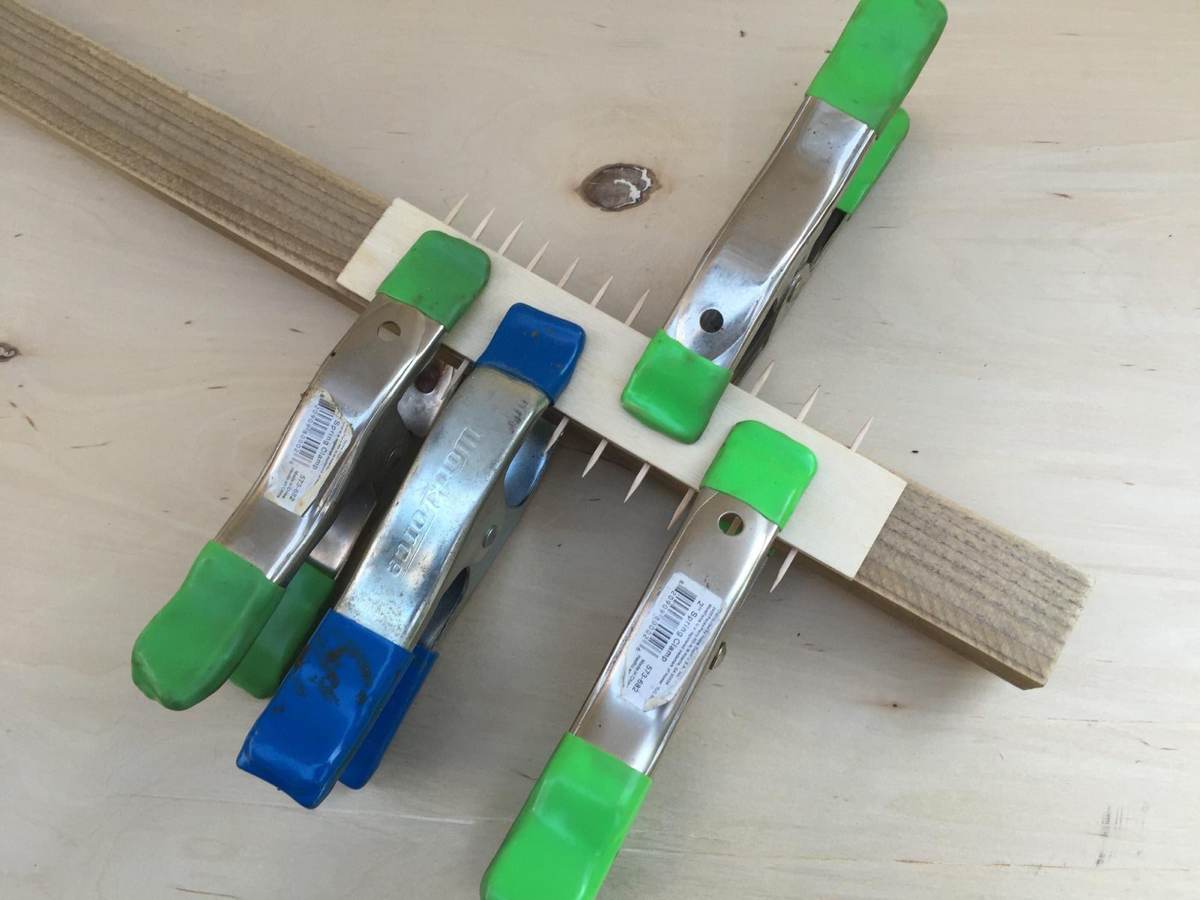
Here's a photo of the freshly glued frets and how I clamped them for drying.
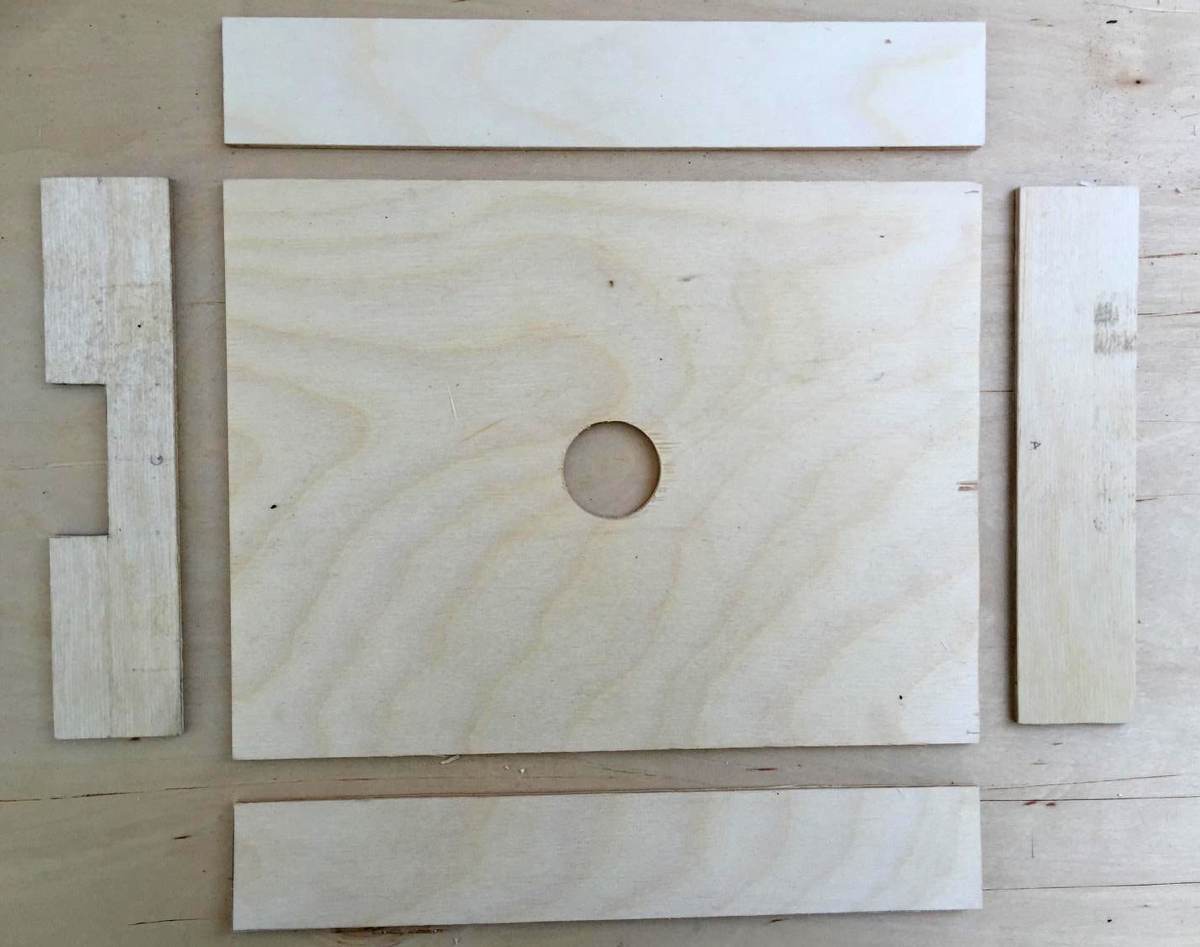
The body is made from the same craft plywood. At first I tried to make a square body but then I realized it would be too short for the bridge. This was one of many mistakes I made along the way. I ended up making a rectangular body. The cut-out on the left is for the neck.
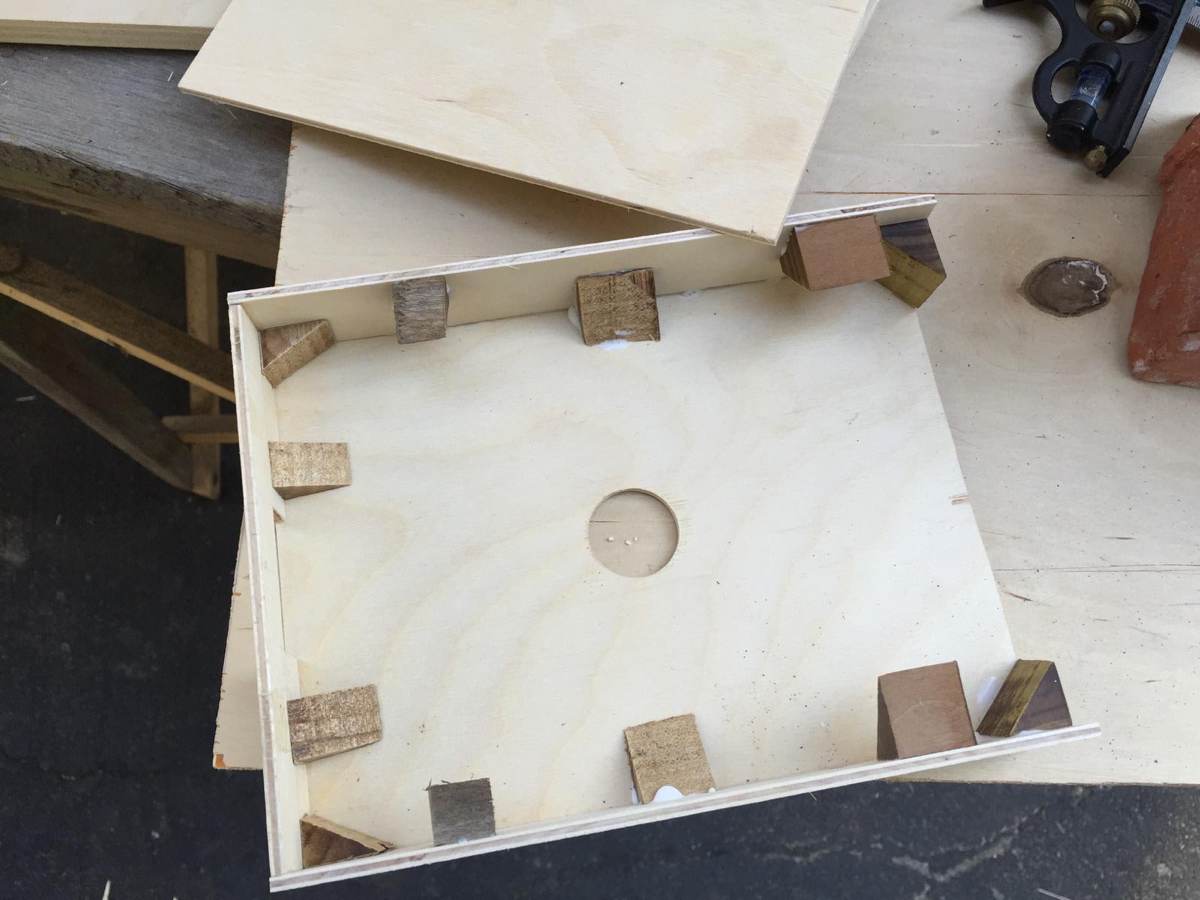
When gluing the body together, I used a bunch of scrap pieces of wood with right angles for bracing.
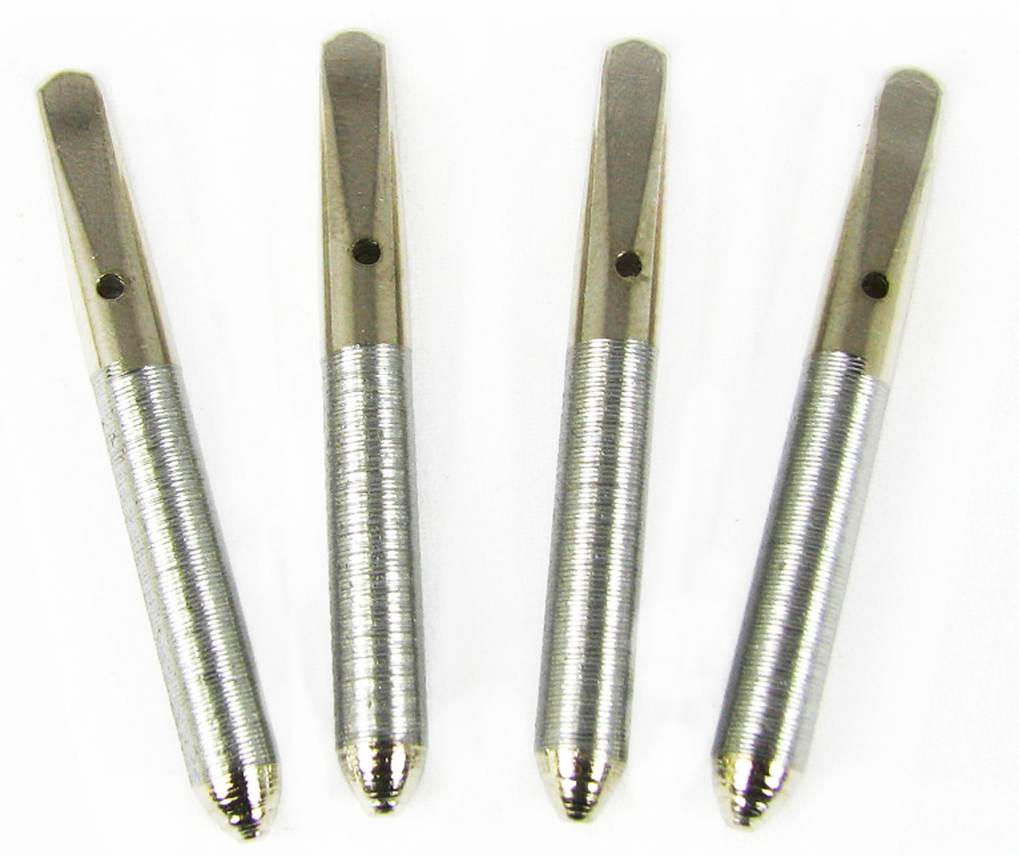
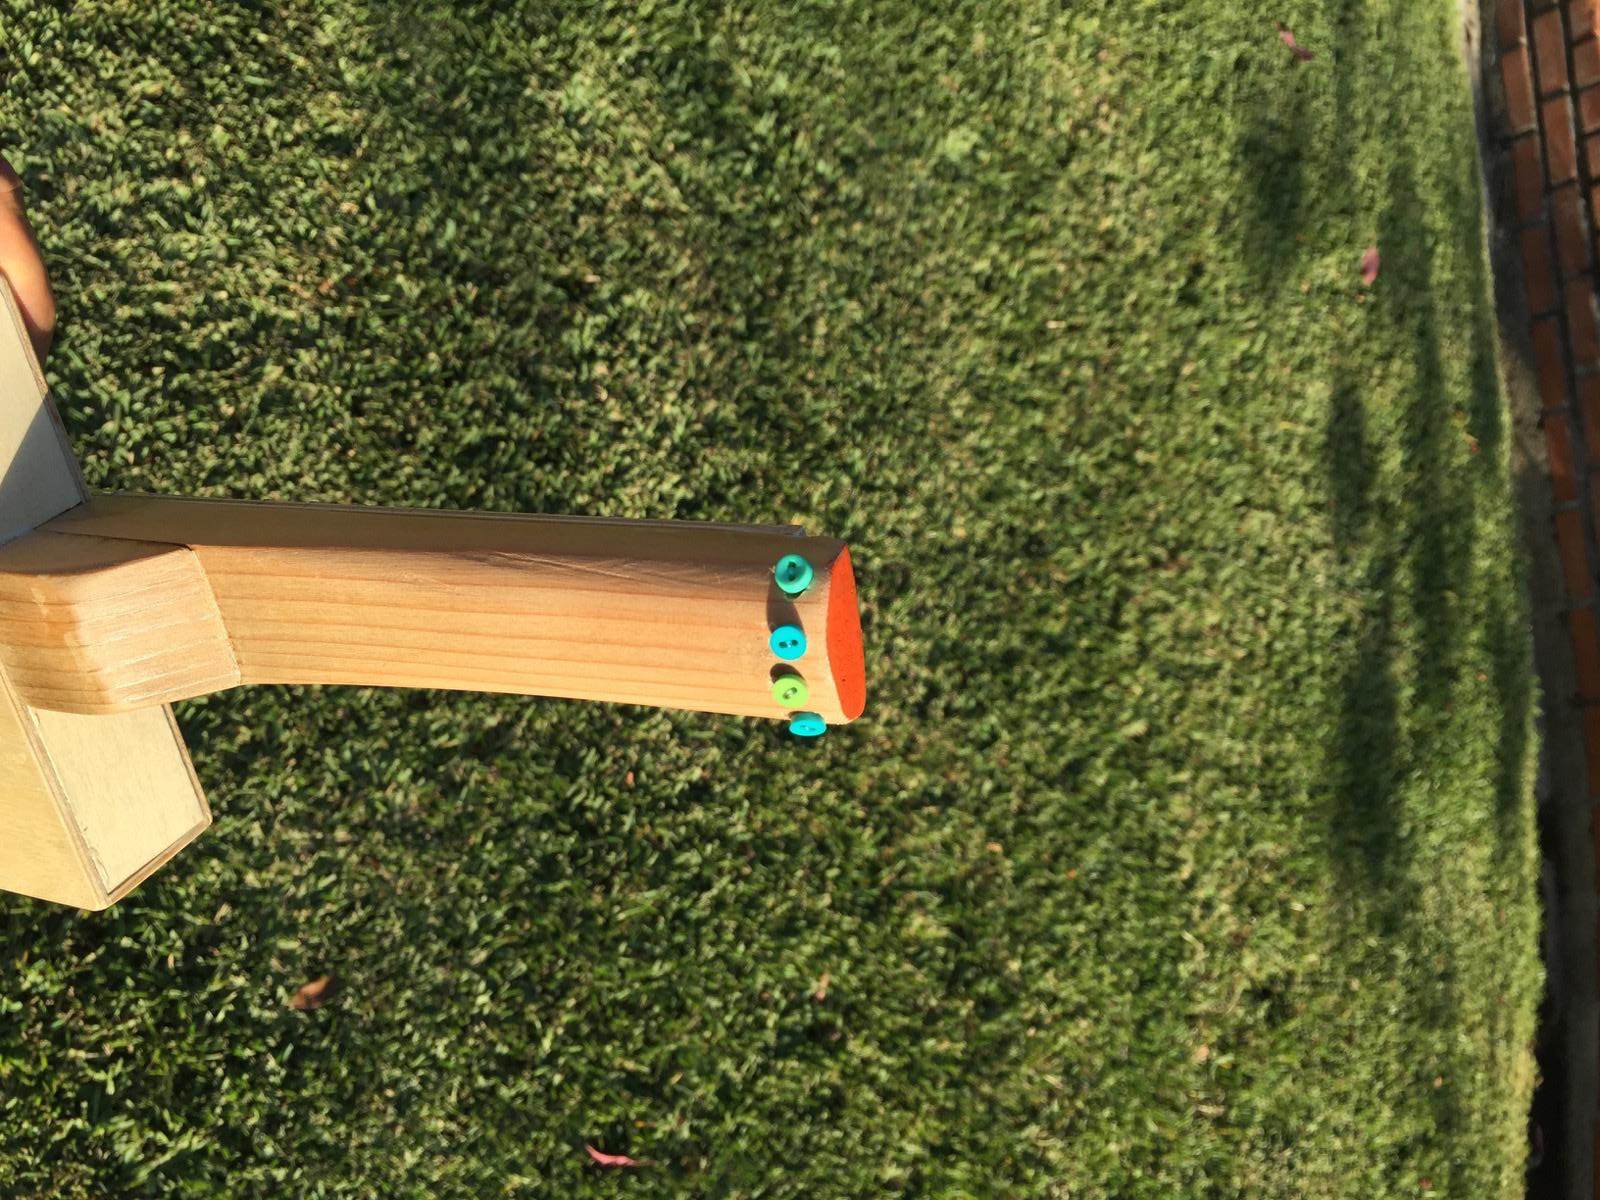
Instead of regular tuners, I used zither tuning pegs. C.B Gitty sells a 4-pack for $4.19. (Don't forget to buy a tuning key!)
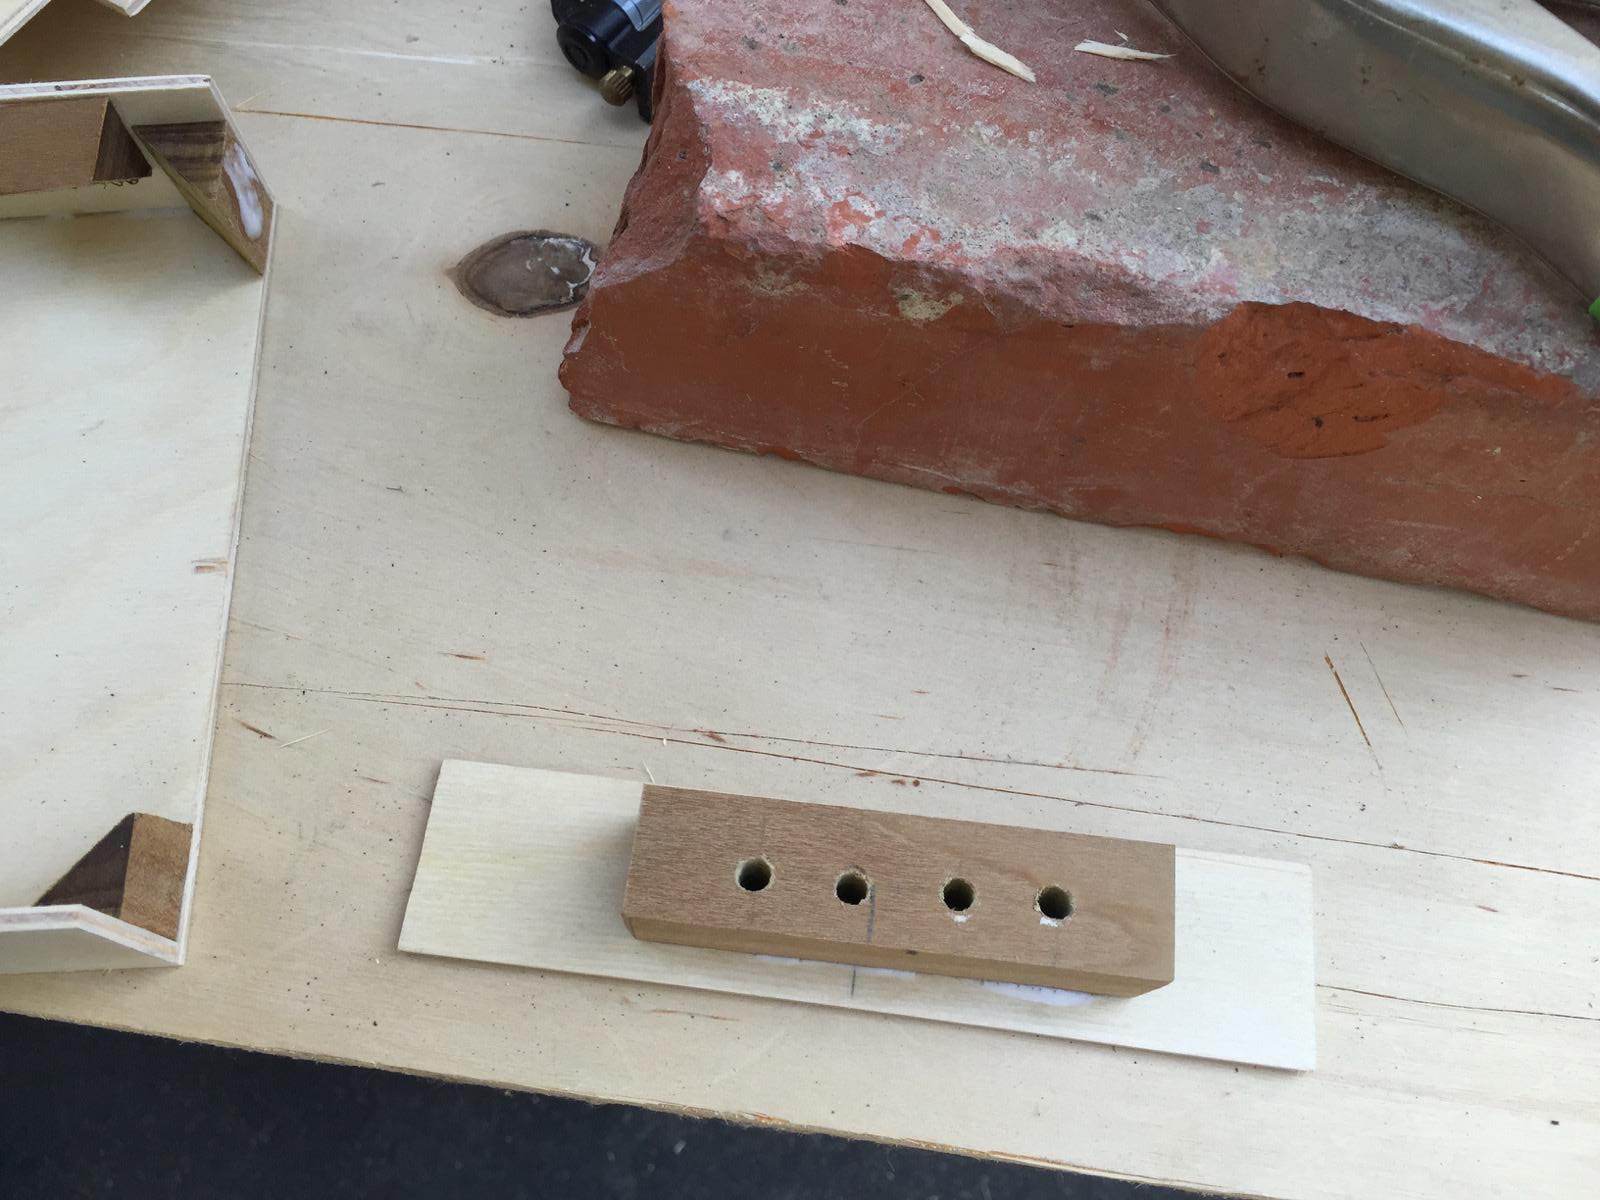
Here's a block of wood glued to the inside of the body for the zither pegs to fit into.
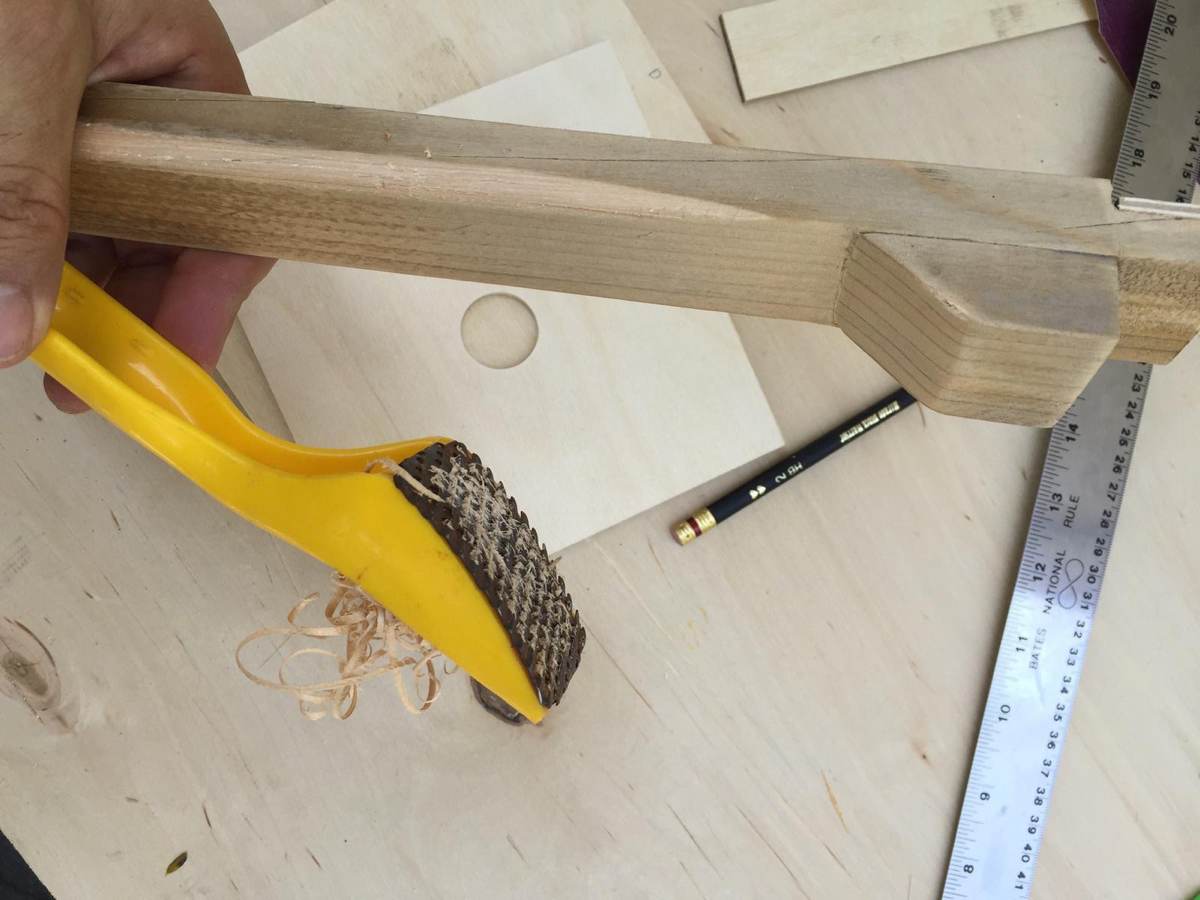
Back to the neck: I used a rasp to quickly round the edges of the neck, followed by sandpaper. I made a bridge with a few scrap pieces of plywood glued together and shaped it with the Moto-Tool.
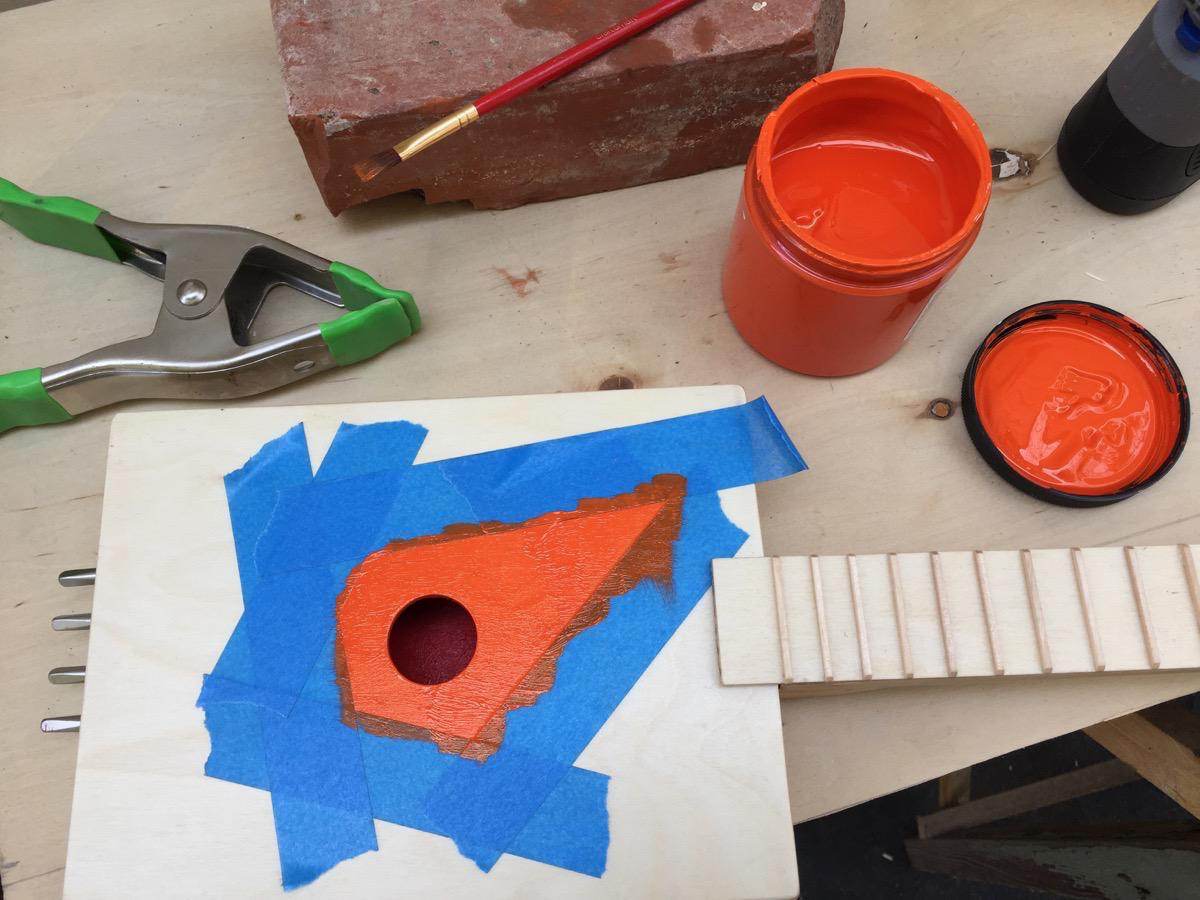
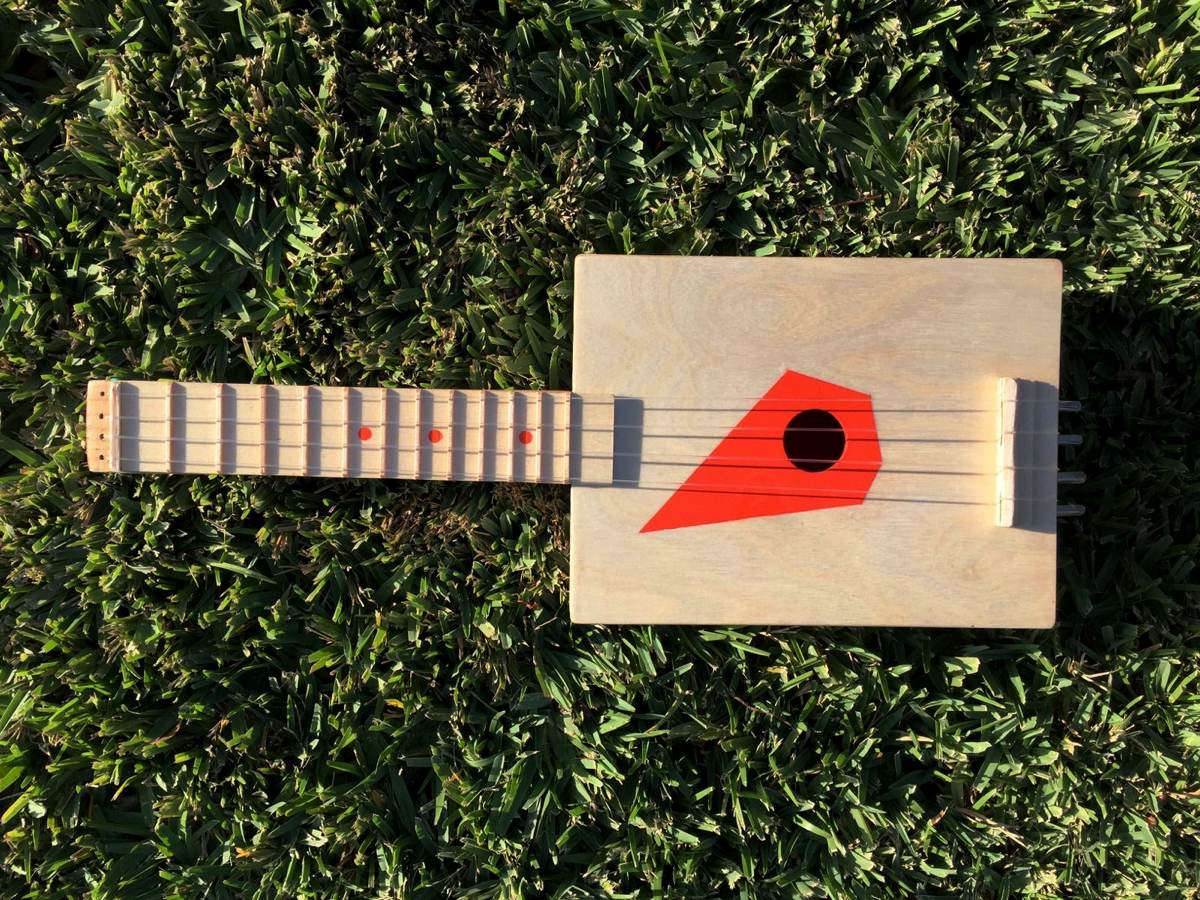
After gluing the neck and body together, I painted a geometric fireball on the front. I then sprayed many coats of acrylic sealer on the uke, then strung it. Here's the finished instrument (see if you can spot the glaring mistake):
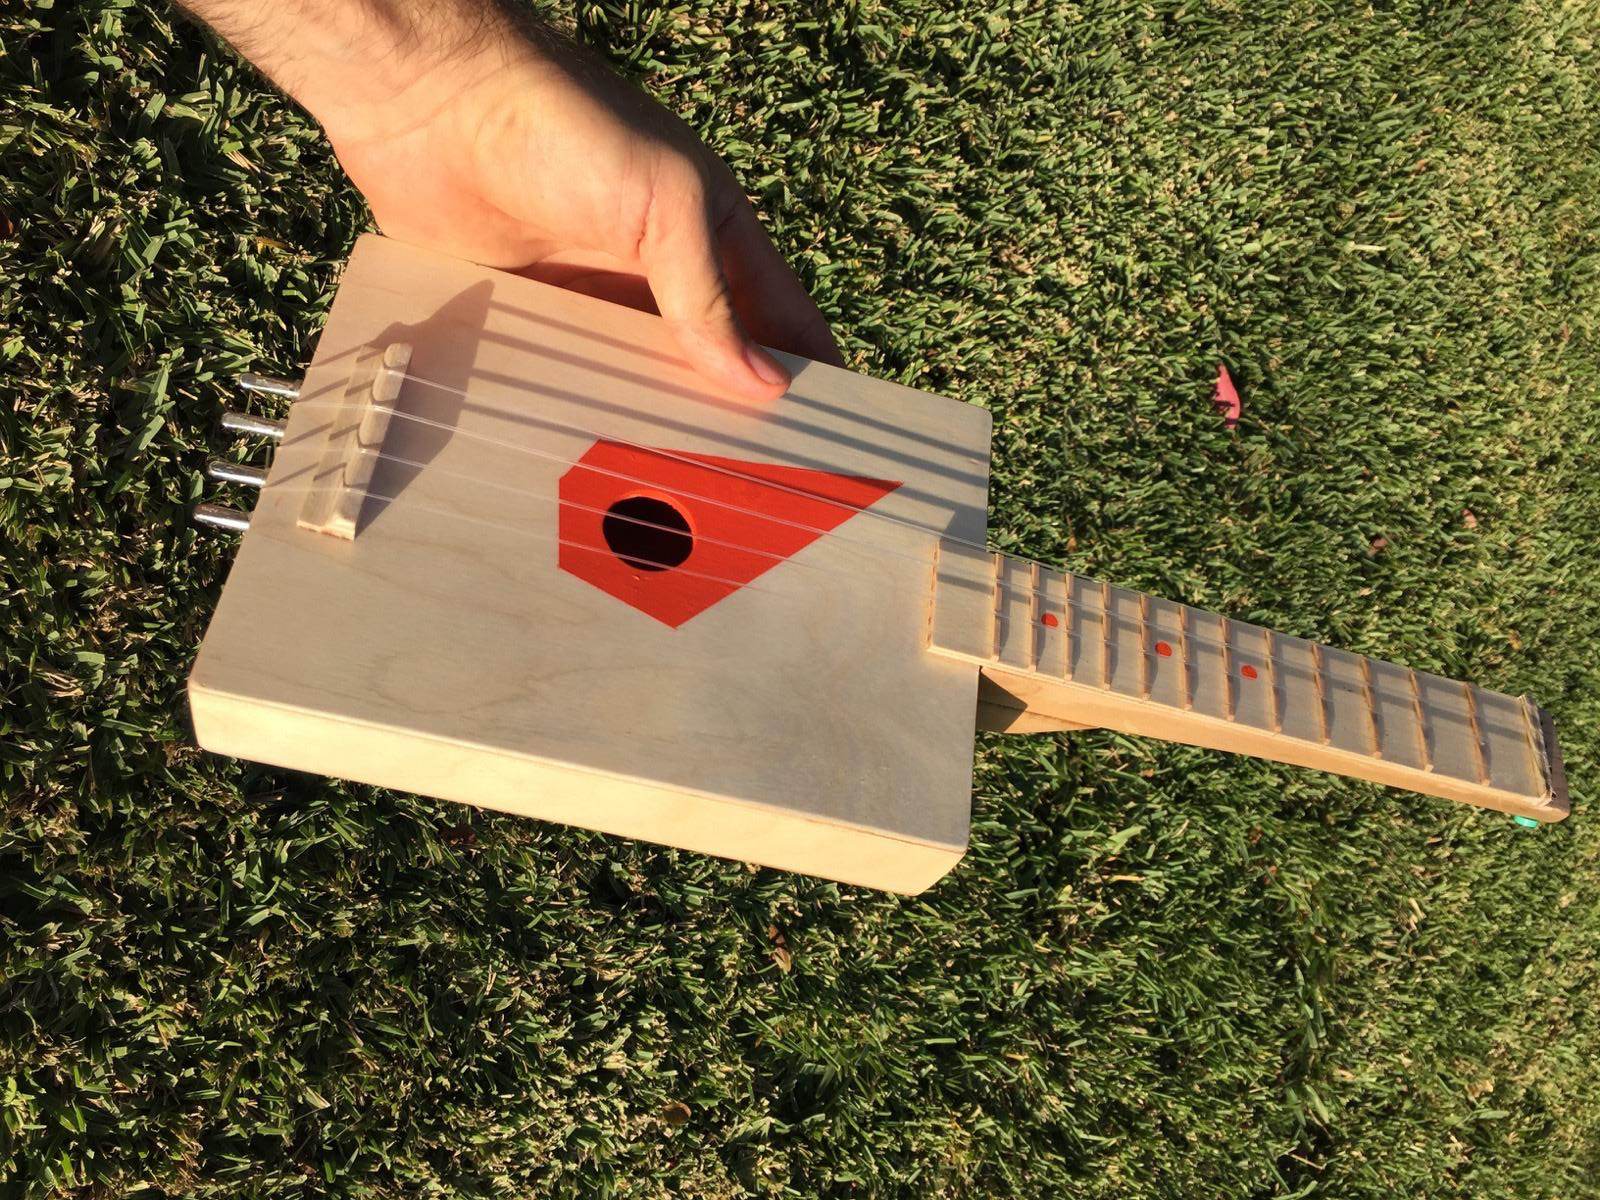

If I make another one like this. I'm going to use regular tuning pegs. It's a bit of a hassle using the zither key to tune the ukuele.
Here's a sample of the sound. (It sounds better than I can play.):
[audio mp3="https://media.boingboing.net/wp-content/uploads/2016/05/fireball-uke.mp3"][/audio]
Many thanks to Dremel for sponsoring this build!
Original Link: http://feeds.boingboing.net/~r/boingboing/iBag/~3/cbSjieeABVw/how-to-build-a-ukulele-from-sc.html
