
An Interest In:
Web News this Week
- March 27, 2024
- March 26, 2024
- March 25, 2024
- March 24, 2024
- March 23, 2024
- March 22, 2024
- March 21, 2024
Some of Our Sources
- Mashable
- Just Creative
- Pearsonified
- The Logo Smith
- Abduzeedo
- You The Designer
- Crazy Leaf Design
- Stylized Web
- Freelance Switch
- Hashedout
Help Webnuz
Referal links:
Getting Started With Google Maps for Android: Advanced
1. Introduction
While the standard features of Google Maps are incredibly useful, there will be times that you want to do a little bit more. Luckily, Google has created an open source library containing a set of utilities that Android developers can use to make their applications even better with enhanced maps.
In this tutorial, you will learn how to use this utility library to add heat map visualizations for your data, cluster large numbers of markers for easier viewing, and use various utility methods for working with the spherical nature of the Earth or drawing routes on roads.
The source files for this tutorial can be found on GitHub.
2. Setup
In the first tutorial of this series, I went over how to set up a project using the Google Developer Console and adding an API key to your manifest. For this tutorial, you need to get an API key and set up your project with a manifest as described there.
Next, open build.gradle and add two new dependencies, one for Play Services to use Google Maps and another one for the Google Maps Utils library.
compile 'com.google.android.gms:play-services-maps:7.8.0'
compile 'com.google.maps.android:android-maps-utils:0.4'
I should note that the Google Maps Utils library is technically still in beta, though it has been available for the last two years. Once you have imported these libraries and synced the project, you need to update the layout file for MainActivity.java so that it uses the custom fragment shown below.
<RelativeLayout xmlns:android="https://schemas.android.com/apk/res/android"
    xmlns:tools="https://schemas.android.com/tools" android:layout_width="match_parent"
    android:layout_height="match_parent" android:paddingLeft="@dimen/activity_horizontal_margin"
    android:paddingRight="@dimen/activity_horizontal_margin"
    android:paddingTop="@dimen/activity_vertical_margin"
    android:paddingBottom="@dimen/activity_vertical_margin" tools:context=".MainActivity">

    <fragment
        android:id="@+id/list_fragment"
        android:layout_width="match_parent"
        android:layout_height="match_parent"
        android:name="com.tutsplus.mapsdemo.fragment.UtilsListFragment" />

</RelativeLayout>
Next, create the UtilsListFragment class that is used above so that it displays a simple list of items representing the various parts of the library you will learn about in this tutorial.
public class UtilsListFragment extends ListFragment {

    @Override
    public void onCreate(Bundle savedInstanceState) {
        super.onCreate(savedInstanceState);
        ArrayAdapter<String> adapter = new ArrayAdapter<String>( getActivity(), android.R.layout.simple_list_item_1 );
        String[] items = getResources().getStringArray( R.array.list_items );
        adapter.addAll( new ArrayList( Arrays.asList(items) ) );
        setListAdapter( adapter );
    }

    @Override
    public void onListItemClick(ListView l, View v, int position, long id) {
        super.onListItemClick(l, v, position, id);

        String item = ( (TextView) v ).getText().toString();
        if( getString( R.string.item_clustering ).equalsIgnoreCase( item ) ) {
            startActivity( new Intent( getActivity(), ClusterMarkerActivity.class ) );
        } else if( getString( R.string.item_heat_map ).equalsIgnoreCase( item ) ) {
            startActivity( new Intent( getActivity(), HeatMapActivity.class ) );
        } else if( getString( R.string.item_polylines ).equalsIgnoreCase( item ) ) {
            startActivity( new Intent( getActivity(), PolylineActivity.class ) );
        } else if( getString( R.string.item_spherical_geometry ).equalsIgnoreCase( item ) ) {
            startActivity( new Intent( getActivity(), SphericalGeometryActivity.class ) );
        }
    }
}
Each of the strings are defined and placed into a string-array for uniformity.
<string name="item_clustering">Clustering</string>
<string name="item_heat_map">Heat Map</string>
<string name="item_polylines">Polyline Decoding</string>
<string name="item_spherical_geometry">Spherical Geometry Utils</string>

<string-array name="list_items">
    <item>@string/item_clustering</item>
    <item>@string/item_heat_map</item>
    <item>@string/item_polylines</item>
    <item>@string/item_spherical_geometry</item>
</string-array>

Once your list is available, you need to create BaseMapActivity.java, which handles all of the common map related setup for each of the example activities that you will build. This Activity initializes a GoogleMap and zooms the camera in to a specified area. In this case, that area is the city of Denver in Colorado, USA. Everything in this class should look familiar from the last two articles in this series.
public abstract class BaseMapActivity extends AppCompatActivity {

    protected LatLng mCenterLocation = new LatLng( 39.7392, -104.9903 );

    protected GoogleMap mGoogleMap;

    @Override
    protected void onCreate(Bundle savedInstanceState) {
        super.onCreate(savedInstanceState);
        setContentView( getMapLayoutId() );
        initMapIfNecessary();
    }

    @Override
    protected void onResume() {
        super.onResume();
        initMapIfNecessary();
    }

    protected void initMapIfNecessary() {
        if( mGoogleMap != null ) {
            return;
        }

        mGoogleMap = ( (MapFragment) getFragmentManager().findFragmentById( R.id.map ) ).getMap();

        initMapSettings();
        initCamera();
    }

    protected void initCamera() {
        CameraPosition position = CameraPosition.builder()
                .target( mCenterLocation )
                .zoom( getInitialMapZoomLevel() )
                .build();

        mGoogleMap.animateCamera(CameraUpdateFactory.newCameraPosition(position), null);
    }

    protected int getMapLayoutId() {
        return R.layout.activity_map;
    }

    protected float getInitialMapZoomLevel() {
        return 12.0f;
    }

    protected abstract void initMapSettings();
}
Now that you have the initial project built, you can continue on to the next section where you will create a new Activity for each utility that we're going to cover in this tutorial.
3. Heat Maps
Heat maps are an excellent way to visually represent concentrations of data points on a map. The Google Maps Utils library makes it easy to add them to an application. To start, create a new BaseMapActivity named HeatMapActivity and add it to your AndroidManifest.xml file. At the top of that class, declare a HeatmapTileProvider that we'll use to construct the map overlay.
private HeatmapTileProvider mProvider;
In BaseMapActivity, a method named initMapSettings is called that allows you to add your customizations to the map. For this Activity, you need to override that method to get an ArrayList of LatLng objects that is then used to generate the HeatmapTileProvider object.
The provider has various methods that can be used to change the appearance of your heat map, such as the gradient colors, the radius for each point, and the weight of each point. Once your provider is built, you can create the heat map TileOverlay and apply it to your map.
@Override
protected void initMapSettings() {
    ArrayList<LatLng> locations = generateLocations();
    mProvider = new HeatmapTileProvider.Builder().data( locations ).build();
    mProvider.setRadius( HeatmapTileProvider.DEFAULT_RADIUS );
    mGoogleMap.addTileOverlay(new TileOverlayOptions().tileProvider(mProvider));
}
In the above implementation of initMapSettings, generateLocations is a helper method that generates 1000 LatLng positions around the central map location.
private ArrayList<LatLng> generateLocations() {
    ArrayList<LatLng> locations = new ArrayList<LatLng>();
    double lat;
    double lng;
    Random generator = new Random();
    for( int i = 0; i < 1000; i++ ) {
        lat = generator.nextDouble() / 3;
        lng = generator.nextDouble() / 3;
        if( generator.nextBoolean() ) {
            lat = -lat;
        }
        if( generator.nextBoolean() ) {
            lng = -lng;
        }
        locations.add(new LatLng(mCenterLocation.latitude + lat, mCenterLocation.longitude + lng));
    }

    return locations;
}
Once you're done implementing initMapSettings and generateLocations, you can run your app and click on the heat map section to see it in action.

4. Clustering Markers
When a map has a lot of data points in a small area, it can get cluttered very quickly as the user zooms out. Not only this, but having too many markers displayed at once can cause some devices to slow down considerably.
In order to help alleviate some of the frustration caused by these issues, you can use the Google Maps Utils library to animate your markers into clusters. The first thing you need to do is create a new model object that implements the ClusterItem interface. This model needs to implement the getPosition method from the ClusterItem interface in order to return a valid LatLng object.
public class ClusterMarkerLocation implements ClusterItem {

    private LatLng position;

    public ClusterMarkerLocation( LatLng latLng ) {
        position = latLng;
    }

    @Override
    public LatLng getPosition() {
        return position;
    }

    public void setPosition( LatLng position ) {
        this.position = position;
    }
}
With the model created, you can create a new Activity called ClusterMarkerActivity and add it to your manifest. When you initialize your map, you need to create a ClusterManager, associate it with your GoogleMap, and add your LatLng positions as ClusterMarkerLocations to the ClusterManager for the utility to know what to cluster. Take a look at the implementation of initMarkers to better understand how this works.
private void initMarkers() {
    ClusterManager<ClusterMarkerLocation> clusterManager = new ClusterManager<ClusterMarkerLocation>( this, mGoogleMap );
    mGoogleMap.setOnCameraChangeListener(clusterManager);

    double lat;
    double lng;
    Random generator = new Random();
    for( int i = 0; i < 1000; i++ ) {
        lat = generator.nextDouble() / 3;
        lng = generator.nextDouble() / 3;
        if( generator.nextBoolean() ) {
            lat = -lat;
        }
        if( generator.nextBoolean() ) {
            lng = -lng;
        }
        clusterManager.addItem( new ClusterMarkerLocation( new LatLng( mCenterLocation.latitude + lat, mCenterLocation.longitude + lng ) ) );
    }
}
In this sample, we create 1000 random points to display and add them to the map. The Google Maps Utils library handles everything else for us.


5. Other Utilities
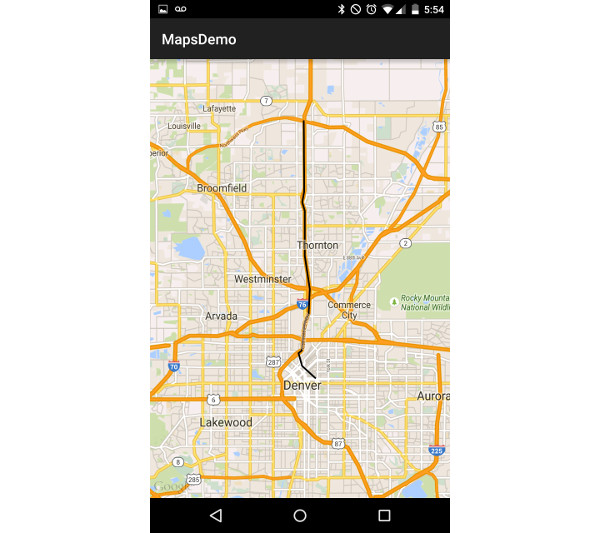
In addition to the last two items, the Google Maps Utils library is full of small useful utilities. If you have many different points that make up a route, you can encode them as a polyline and then add that polyline to your map using PolyUtil. This will display a path between each of the points along the map.
public class PolylineActivity extends BaseMapActivity {

    private static final String polyline = "gsqqFxxu_SyRlTys@npAkhAzY{MsVc`AuHwbB}Lil@}[goCqGe|BnUa`A~MkbG?eq@hRq}@_N}vKdB";

    @Override
    protected void initMapSettings() {
        List<LatLng> decodedPath = PolyUtil.decode(polyline);

        mGoogleMap.addPolyline(new PolylineOptions().addAll(decodedPath));
    }
}
In addition to PolyUtil, Google has added SphericalUtil that can be used to measure distances or figure out geometry along the surface of a sphere. If you want to find the distance between two points on the map, you can call SphericalUtil.computeDistanceBetween( LatLng position1, LatLng position2 ) to return a double of the distance in meters. If you want to find the heading between two points, you can call SphericalUtil.computeHeading( LatLng point1, LatLng point2 ).

In relation to this, another utility method in the SpericalUtil class allows you to find a point at a certain heading and distance away. I recommend browsing the documentation to learn more about the SpericalUtil class.
Conclusion
In this tutorial, you have just scratched the surface of the Google Maps Utils library and all it has to offer. Other functionality it can add to your application includes adding overlays for KML data, creating custom markers, and helper methods for working with GeoJSON.
Luckily, Google has open sourced the entire library, so you can find the library's source code and demo code on GitHub. After having gone through the last three parts of this series, you should now be comfortable enough with Google Maps to add them to your own applications to enrich the user experience and make great apps.
Original Link:
TutsPlus - Code
 Tuts+ is a site aimed at web developers and designers offering tutorials and articles on technologies, skills and techniques to improve how you design and build websites.
More About this Source Visit TutsPlus - Code